內容表格
- 1. 設定模擬系統與實體系統可做檔案交換
- 1.1. 先設定模擬系統的網路為 DHCP
- 1.2. 設定實體系統(Host)的網路
- 2. 參考連結
如果要測試一些 ARM OS
https://wiki.ubuntu.com/ARM
步驟
(https://wiki.edubuntu.org/ARM/BuildArmPackages)
建立工作目錄
mkdir arm_ubuntu-lucid
cd arm_ubuntu-lucid
安裝必要套件及下載 rootstock
sudo apt-get install debootstrap fakeroot bzr
bzr branch lp:project-rootstock
TIPs
bzr 這行指令會上網下載 rootstock 相關檔案,故須保持外網暢通。
rootstock 可以自動建立一個 rootfs 的 tarball 檔,詳見此連結。
下載 Lucid 的 vmlinuz 檔
wget http://ports.ubuntu.com/ubuntu-ports/dists/lucid/main/installer-armel/current/images/versatile/netboot/vmlinuz
建立系統映像檔 qemu_ubuntu-lucid_arm.img
sudo project-rootstock/rootstock --fqdn ubuntu --login ubuntu --password ubuntu --notarball --imagesize 3G
mv qemu-armel-201203301652.img qemu_ubuntu-lucid_arm.img
TIPs
系統建立映像檔時需要一些時間,請耐心等候。
產生的檔名會以日期來命名。
執行時必須用 sudo。
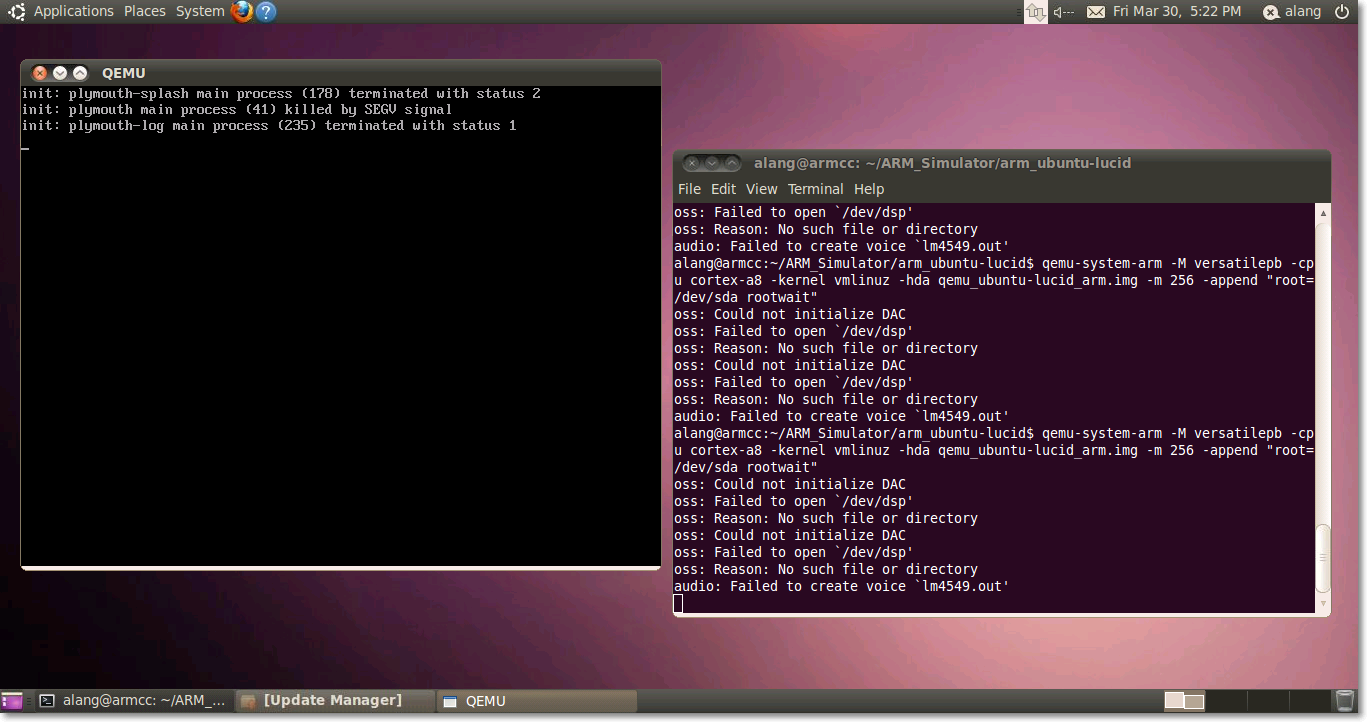
啟動模擬系統
qemu-system-arm -M versatilepb -cpu cortex-a8 -kernel vmlinuz -hda qemu_ubuntu-lucid_arm.img -m 256 -append "root=/dev/sda rootwait"
如果看到以下的畫面,就表示成功。
接著按下 ALT+F1,會出現登入提示,以 ubuntu : ubuntu 登入。
設定模擬系統與實體系統可做檔案交換
為了要與模擬系統做檔案交換,必須先設定好網路。
先設定模擬系統的網路為 DHCP
vi /etc/network/interface
interface:
auto eth0
iface eth0 inet dhcp
啟動網路 eth0
sudo ifconfig eth0 up
sudo dhclient eth0
TIPs
正常系統會分配到 IP 10.0.2.x,這是由 qemu 內部所分配的。
這個網路設定是永久的,下次重開機時,仍然有效。
設定實體系統(Host)的網路
在 Host 端需要安裝 DHCP server 套件 dnsmasq,以及新增 qemu-ifup
sudo apt-get install dnsmasq
套件安裝完後,系統會自動啟動服務,必須手動將它關閉,因為會由 qemu-ifup 來啟動
/etc/init.d/dnsmasq stop
update-rc.d -f dnsmasq remove
新增 /etc/qemu-ifup
#!/bin/sh
#
# Copyright IBM, Corp. 2010
#
# Authors:
#  Anthony Liguori <aliguori@us.ibm.com>
#
# This work is licensed under the terms of the GNU GPL, version 2.  See
# the COPYING file in the top-level directory.

# Set to the name of your bridge
BRIDGE=br0

# Network information
NETWORK=192.168.53.0
NETMASK=255.255.255.0
GATEWAY=192.168.53.1
DHCPRANGE=192.168.53.2,192.168.53.254

# Optionally parameters to enable PXE support
TFTPROOT=
BOOTP=

do_brctl() {
    brctl "$@"
}

do_ifconfig() {
    ifconfig "$@"
}

do_dd() {
    dd "$@"
}

do_iptables_restore() {
    iptables-restore "$@"
}

do_dnsmasq() {
    dnsmasq "$@"
}

check_bridge() {
    if do_brctl show | grep "^$1" > /dev/null 2> /dev/null; then
	return 1
    else
	return 0
    fi
}

create_bridge() {
    do_brctl addbr "$1"
    do_brctl stp "$1" off
    do_brctl setfd "$1" 0
    do_ifconfig "$1" "$GATEWAY" netmask "$NETMASK" up
}

enable_ip_forward() {
    echo 1 | do_dd of=/proc/sys/net/ipv4/ip_forward > /dev/null
}

add_filter_rules() {
do_iptables_restore <<EOF
# Generated by iptables-save v1.3.6 on Fri Aug 24 15:20:25 2007
*nat
:PREROUTING ACCEPT [61:9671]
:POSTROUTING ACCEPT [121:7499]
:OUTPUT ACCEPT [132:8691]
-A POSTROUTING -s $NETWORK/$NETMASK -j MASQUERADE
COMMIT
# Completed on Fri Aug 24 15:20:25 2007
# Generated by iptables-save v1.3.6 on Fri Aug 24 15:20:25 2007
*filter
:INPUT ACCEPT [1453:976046]
:FORWARD ACCEPT [0:0]
:OUTPUT ACCEPT [1605:194911]
-A INPUT -i $BRIDGE -p tcp -m tcp --dport 67 -j ACCEPT
-A INPUT -i $BRIDGE -p udp -m udp --dport 67 -j ACCEPT
-A INPUT -i $BRIDGE -p tcp -m tcp --dport 53 -j ACCEPT
-A INPUT -i $BRIDGE -p udp -m udp --dport 53 -j ACCEPT
-A FORWARD -i $1 -o $1 -j ACCEPT
-A FORWARD -s $NETWORK/$NETMASK -i $BRIDGE -j ACCEPT
-A FORWARD -d $NETWORK/$NETMASK -o $BRIDGE -m state --state RELATED,ESTABLISHED -j ACCEPT
-A FORWARD -o $BRIDGE -j REJECT --reject-with icmp-port-unreachable
-A FORWARD -i $BRIDGE -j REJECT --reject-with icmp-port-unreachable
COMMIT
# Completed on Fri Aug 24 15:20:25 2007
EOF
}

start_dnsmasq() {
    do_dnsmasq \
	--strict-order \
	--except-interface=lo \
	--interface=$BRIDGE \
	--listen-address=$GATEWAY \
	--bind-interfaces \
	--dhcp-range=$DHCPRANGE \
	--conf-file="" \
	--pid-file=/var/run/qemu-dnsmasq-$BRIDGE.pid \
	--dhcp-leasefile=/var/run/qemu-dnsmasq-$BRIDGE.leases \
	--dhcp-no-override \
	${TFTPROOT:+"--enable-tftp"} \
	${TFTPROOT:+"--tftp-root=$TFTPROOT"} \
	${BOOTP:+"--dhcp-boot=$BOOTP"}
}

setup_bridge_nat() {
    if check_bridge "$1" ; then
	create_bridge "$1"
	enable_ip_forward
	add_filter_rules "$1"
	start_dnsmasq "$1"
    fi
}

setup_bridge_vlan() {
    if check_bridge "$1" ; then
	create_bridge "$1"
	start_dnsmasq "$1"
    fi
}

setup_bridge_nat "$BRIDGE"

if test "$1" ; then
    do_ifconfig "$1" 0.0.0.0 up
    do_brctl addif "$BRIDGE" "$1"
fi
/etc/qemu-ifdown:
#! /bin/bash

BR="br0"
echo "Executing /etc/qemu-ifdown"
echo "Remove Bridge $BR..."
/sbin/ifconfig $BR down
/usr/sbin/brctl delbr $BR

echo "Cleaning up the iptables rules"
/sbin/iptables -F
/sbin/iptables -X

echo "Kill the process dnsmasq"
killall dnsmasq
重啟機器
開啟 Qemu image 時用以下指令:
sudo qemu-system-arm -M versatilepb -cpu cortex-a8 -kernel vmlinuz -hda qemu_ubuntu-lucid_arm.img -m 256 -append "root=/dev/sda rootwait" -net nic -net tap,ifname=tap0
TIPs
-M 機器類型
-cpu 處理器類型
-m RAM 的大小
-net nic,macaddr=00:16:3e:00:00:01 模擬系統啟動一個網路裝置,如果多人共用 Qemu 環境,若有網路衝突問題,可加上 macaddr。
-net tap,ifname=tap0,script=no 實體系統啟動一個網路通道,並命名為 tap0, tap1, tap2,....., script 未指定時,會執行 /etc/qemu-ifup, qemu-ifdown。必須使用 sudo 執行,否則 tap 網路裝置無法啟動。
參考連結
- Was this page helpful?
- 標籤 (Edit tags)
- 什麼連接到這裡
文件 1
| 文件 | 大小 | 日期 | 附件上傳者 | |||
|---|---|---|---|---|---|---|
| qemu_arm-ubuntu_start.png 無描述 | 141.94 KB | 17:24, 30 Mar 2012 | alang | 動作 | |
| Images 1 | ||
|---|---|---|
 | ||