內容表格
設定 Asterisk 啟用加密的 SIP 訊號 - TLS(Transport Layer Security)。
系統環境:
- PIAF 1.7.5.5 (Asterisk 1.6.2.17)
- CentOS 5.5
新增 CA(Certificate Authority)
#mkdir /etc/asterisk/cert
#cd /etc/asterisk/cert
#openssl genrsa -des3 -out ca.key 4096
Generating RSA private key, 4096 bit long modulus
...........................................................................................................................++
....................................................................................................................................++
e is 65537 (0x10001)
Enter pass phrase for ca.key: 自訂密碼
Verifying - Enter pass phrase for ca.key: 確認輸入

自我簽署(self-signed)憑證
#openssl req -new -x509 -days 365 -key ca.key -out ca.crt
Enter pass phrase for ca.key: 輸入 ca.key 密碼
You are about to be asked to enter information that will be incorporated
into your certificate request.
What you are about to enter is what is called a Distinguished Name or a DN.
There are quite a few fields but you can leave some blank
For some fields there will be a default value,
If you enter '.', the field will be left blank.
-----
Country Name (2 letter code) [GB]:TW
State or Province Name (full name) [Berkshire]:OSSLab
Locality Name (eg, city) [Newbury]:HC
Organization Name (eg, company) [My Company Ltd]:OSSLAB
Organizational Unit Name (eg, section) []:OSSLAB
Common Name (eg, your name or your server's hostname) []:<主機的IP或名稱>
Email Address []:
Tips:
* Common Name 必須輸入用戶端要連結的主機的名稱或IP位址
* 簽署憑證檔 ca.crt 的產生方式可以使用自我簽署 (self-signed) 或者付費由國際認證機構來簽署,例如 VeriSign。
* 複製 ca.crt 到用戶端的電腦並匯入到 "信任根憑證區"
* 憑證檔 ca.crt 有日期的限制,預設是 365 天,到期日超過後,此憑證就會失效。
如何匯入 ca.crt 到用戶端電腦
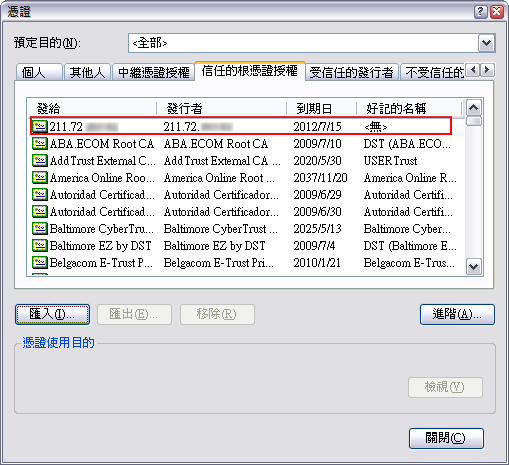
Windows XP)
控制台 > 網際網路選項 > 內容 > 憑證 > 匯入
- 選擇 ca.crt 的檔案路徑
- 自動根據憑證類型來選取憑證存放區 (*重要*)
- 繼續完成
要確認 ca.crt 匯入完成,可以檢視 信任的根憑證授權 是否有包含剛剛新增的項目。

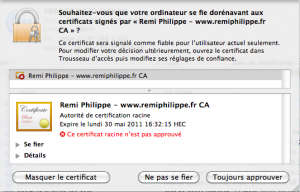
Mac OS)
點擊 ca.crt 選擇 Always Trust。
新增 Server Certificate for Asterisk
1. 建立 private key
#cd /etc/asterisk/cert
#openssl genrsa -out server.key 1024
Generating RSA private key, 1024 bit long modulus
................++++++
................++++++
e is 65537 (0x10001)
2. 建立 CSR (Certificate Signing Request)
#openssl req -new -key server.key -out server.csr
You are about to be asked to enter information that will be incorporated
into your certificate request.
What you are about to enter is what is called a Distinguished Name or a DN.
There are quite a few fields but you can leave some blank
For some fields there will be a default value,
If you enter '.', the field will be left blank.
-----
Country Name (2 letter code) [GB]:TW
State or Province Name (full name) [Berkshire]:OSSLAb
Locality Name (eg, city) [Newbury]:HC
Organization Name (eg, company) [My Company Ltd]:ossLAB
Organizational Unit Name (eg, section) []:OssLab
Common Name (eg, your name or your server's hostname) []:alang
Email Address []:

Please enter the following 'extra' attributes
to be sent with your certificate request
A challenge password []:
An optional company name []:
3. 簽署憑證
#openssl x509 -req -days 365 -in server.csr -CA ca.crt -CAkey ca.key -set_serial 01 -out server.crt
Signature ok
subject=/C=TW/ST=OSSLAb/L=HC/O=ossLAB/OU=OssLab/CN=alang
Getting CA Private Key
Enter pass phrase for ca.key: 輸入 ca.key 的密碼
建立 Asterisk 用的憑證檔 asterisk.pem
#cd /etc/asterisk/cert
#cat server.key > asterisk.pem
#cat server.crt >> asterisk.pem
#cat asterisk.pem
asterisk.pem:
-----BEGIN RSA PRIVATE KEY-----
MIICXQIBAAKBgQC0TP0bCK3RMHnqkf/VbrNzIR0Q4gSRxCjOCUHnGuPa1Y1hXV4U
0UeEgLyNPZzs2y56BXUhudgOM5U4AO+3KxlxRfycf5QFJUUmytTTtseFdX6aOHXb
...
9GxCKMrCRZAGPbo2dhyZkkc5m1WB8AHs3dJvME9nsBS/
-----END RSA PRIVATE KEY-----
-----BEGIN CERTIFICATE-----
MIIDsTCCAZkCAQEwDQYJKoZIhvcNAQEFBQAwYTELMAkGA1UEBhMCVFcxCzAJBgNV
BAgTAlRXMQswCQYDVQQHEwJIQzEPMA0GA1UEChMGT1NTTGFiMQ8wDQYDVQQLEwZv
...
Ae4tAwLILAWHsnJLyw3wkJW4fOtX4M5+Td2tnR6GkbobXeK63Q==
-----END CERTIFICATE-----
設定 Asterisk
FreePBX > Tools > Config Edit > sip_general_custom.conf
tlsenable=yes
tlsbindaddr=0.0.0.0
tlscertfile=/etc/asterisk/cert/asterisk.pem
FreePBX > Tools > Config Edit > sip_custom_post.conf
[100](+)
transport=tls
Notes:
* 100 是現有的分機號碼,雖然 FreePBX 的分機介面無法設定 TLS,但可以修改此檔添加 TLS。
* 一旦該分機啟用 TLS 後,就無法使用非加密的方式註冊。
* 雖然分機註冊必須用憑證,但密碼仍是必要的。
重啟 Asterisk 服務
如何檢視 Asterisk 啟用 TLS,預設使用 TCP 5061 port
#netstat -lt
Active Internet connections (only servers)
Proto Recv-Q Send-Q Local Address               Foreign Address             State
tcp        0      0 *:sip-tls                   *:*                         LISTEN    <=====
tcp        0      0 *:etlservicemgr             *:*                         LISTEN
tcp        0      0 *:mysql                     *:*                         LISTEN
tcp        0      0 *:5038                      *:*                         LISTEN
tcp        0      0 *:sunrpc                    *:*                         LISTEN
tcp        0      0 *:sieve                     *:*                         LISTEN
tcp        0      0 *:h323hostcall              *:*                         LISTEN
tcp        0      0 pbx.local:smtp              *:*                         LISTEN
tcp        0      0 *:upnotifyp                 *:*                         LISTEN
tcp        0      0 *:http                      *:*                         LISTEN
tcp        0      0 *:ssh                       *:*                         LISTEN
tcp        0      0 *:glrpc                     *:*                         LISTEN
tcp        0      0 *:paragent                  *:*                         LISTEN
檢查分機的 TLS 啟用
asterisk -rx "sip show peer 100"
...
 Prim.Transp. : TLS
 Allowed.Trsp : TLS
...
Reg. Contact : sip:100@123.123.123.123:54497;transport=TLS;rinstance=f4a38bde389d7620
...
主機端設定 Iptables (適用 PIAF 用戶)
編輯 /etc/sysconfig/iptables,加上這二行
# Allow TLS connections to our SIP server
-A INPUT -p tcp -m tcp --dport 5061 -j ACCEPT
重啟 iptables
services iptables restart
用戶端的終端電話設定
注意:終端電話不管是硬體或軟體,必須要有支援 TLS +SRTP。
軟體電話有支援的,包含:
- Eyebeam 1.5+ (免費版 X-Lite 不支援)
- Blink
- 3CX Phone
Eyebeam 1.5)
SIP Account Setting > Add
> Account
Display Name =
User Name =
Password =
Domain = 123.123.123.123: 5061
> Security
Signaling Transport = TLS
Media Encryption : 視情況設定
- Make and accept only encrypted calls (Asterisk 必須啟用 SRTP)
- Prefer to make and accept encrypted calls (Asterisk 必須啟用 SRTP)
- Make unencrypted calls, accept all calls
- Do not allow encrypted calls
註:Eyebeam 的憑證是使用 Windows 的。
3CX Phone)
Connection > New >
Credentials >
Extension: 100
ID: 100
Password: 註冊密碼
My Location >
I am in the office - local IP : 123.123.123.123:5061 *重要*
選擇另一個也可以
Advanced Settings >
SIP transport: TLS *重要*
Certificates: 選擇憑證檔,但請先將檔名 ca.crt 改成 root_cert_.pem
RTP mode: Normal (如果 Asterisk 支援 SRTP,才能選擇 only secure)
如何從主機確認用戶端使用 TLS 註冊
#asterisk -rx "sip show tcp"
Host                           Port Transport   Type
222.222.222.222           53483  TLS       Server
啟用 SRTP 支援
必要的 Asterisk 的模組:res_srtp
註:如果缺少模組,必須安裝套件 libsrtp,並重新編譯 Asterisk。
設定 SRTP
編輯 sip.conf
[malcolm]
type=peer
secret=malcolm ;note that this is NOT a secure password
host=dynamic
context=local
dtmfmode=rfc2833
disallow=all
allow=g722
transport=tls
encryption=yes <==== 這裡
context=local
FAQ
Q: Eyebeam 設定了 TLS,但出現 Service Unavailable
Ans: 檢查 Asterisk 的 TLS 是否正常開啟以及防火牆的設定。
Q: Eyebeam 設定了 TLS,但出現 Certificate Validate Failure
Ans: 檢查用戶端電腦憑證是否匯入成功。
Q: Command-Line 如何檢視憑證檔的內容
Ans:
// for *.crt
openssl x509 -noout  -text -in ca.crt
// for *.csr
openssl req -noout -text -in server.csr
- Was this page helpful?
- 標籤 (Edit tags)
- 什麼連接到這裡
文件 2
| 文件 | 大小 | 日期 | 附件上傳者 | |||
|---|---|---|---|---|---|---|
| Apple-Certificate-Installation.png 無描述 | 58.64 KB | 12:30, 17 Jul 2011 | alang | 動作 | |
 | Windows_CA.png 無描述 | 17.82 KB | 12:30, 17 Jul 2011 | alang | 動作 | |

