IBM AIX
AIX,是IBM專有UNIX作業系統的商標名。名稱來自先進互動執行系統(英語:Advanced Interactive executive,縮寫為)。最初的名稱來自英語:Advanced IBM Unix,但或許這個名字沒有得到法律部門的允許,因此更改為"Advanced Interactive eXecutive"。
- Migrate System Accounts to another Server
- AIX 管理技巧
- AIX VM with QEMU
- Learning
- AIX VM with virt-manager
- Update Fixpack & Interim Fix
- Q & A
- AIX LVM
- 監控 Errpt
- AIX Monitoring
- AIX Toolbox
- Ksh
- AIX Simple Firewall
Migrate System Accounts to another Server
Cloning AIX users and groups between servers
# one-liner to generate the commands to clone groups
lsgroup -c -a id ALL | grep -v ^# | awk -F: '{print "mkgroup id=" $2, $1}'

# one-liner to generate the commnads to clone users
lsuser -c -a id pgrp groups home shell gecos ALL | grep -v ^# | awk -F: '{print "useradd -m -u", $2, "-g", $3, "-G", $4, "-c \"" $7 "\" -d ", $5, $1}'
Copying AIX password hashes between servers
# grep -p root /etc/security/passwd
root:
password = 2zfymAdUyNdA.
lastupdate = 1360555127

echo 'root:2zfymAdUyNdA.' | chpasswd -ec
gen_reset_password.sh:
#!/usr/bin/ksh

for user in `lsuser -a ALL`; do
        [ -n "$1" -a "$user" != "$1" ] && continue
        if grep -p ^${user}: /etc/security/passwd | grep -q "password = "; then
                hash=`grep -p ^${user}: /etc/security/passwd | grep "password = " | awk -F " = " '{print $2}'`
                echo "echo '${user}:${hash}' | chpasswd -ec"
        fi
done
# ./gen_reset_password.sh
echo 'root:2zfymAdUyNdA.' | chpasswd -ec
echo 'daemon:*' | chpasswd -ec
echo 'bin:*' | chpasswd -ec
echo 'sys:*' | chpasswd -ec
echo 'adm:*' | chpasswd -ec
echo 'uucp:*' | chpasswd -ec
echo 'guest:*' | chpasswd -ec
echo 'nobody:*' | chpasswd -ec
echo 'lpd:*' | chpasswd -ec
echo 'testusr1:MRGY5M7l56OTA' | chpasswd -ec
echo 'testusr2:skG.DjnbSmVaA' | chpasswd -ec
echo 'testusr3:EdRZo9SPb1Jig' | chpasswd -ec
echo 'testusr4:hk3qpcroid1qg' | chpasswd -ec
echo 'testusr5:1XaeSLhwCv19s' | chpasswd -ec
AIX 管理技巧
Install fileset from ISO
# 先掛載 DVD ISO file 至 /mnt/iso
# 範例: 安裝 devices.scsi.disk
root@aixvm:ppc> ls -l /mnt/iso/installp/ppc/devices.scsi.disk
-rw-r--r--    2 4000     4000        1445888 Oct 28 2022  /mnt/iso/installp/ppc/devices.scsi.disk

root@aixvm:ppc> cd /mnt/iso/installp/ppc/

root@aixvm:ppc> installp -acgXYd . devices.scsi.disk
Install lsof
Where to download the lsof, bind, rsyslog, openssh, openssl, etc packages?
lsof_4.892.tar
tar xf lsof_4.892.tar
cd lsof_4.892
installp -acgXYd . lsof.base lsof.license lsof.man.en_US
lsof -v
tar xf lsof_4.892.tar
cd lsof_4.892
smitty installp
# Install Software
# INPUT device / directory for software [.] << Input a dot
# SOFTWARE to install [_all_latest] << Esc + 4, Esc + 7
# ACCEPT new license agreements? yes
User & Group
# Create a new user
mkuser admin="false" pgrp="staff" gecos="Test User" test3
mkuser admin="false" pgrp="staff" groups="sshusers" gecos="Test User" test3

# Remove a user
rmuser -p <user-name>
Network
Check the interface
lsdev -Cc if
lsdev -Cc adapter
lscfg -vpl ent0
lsattr -El ent0
lsattr -El en0
Configure the network
# Set the ip/netmask/gateway
/usr/sbin/mktcpip -h'aixvm' -a'192.168.99.100' -m'255.255.255.0' -i'en0' -g'192.168.99.1' -A'no' -t'N/A'

# Set the DNS server addr
echo "nameserver 1.1.1.1" > /etc/resolv.conf
Check the port opened
netstat -Aan資安相關指令
# Login Failed
who /etc/security/failedlogin | tail -50

# Check the number of previous unsucessful logins for the account to confirm it is blocked
lsuser -a account_locked unsuccessful_login_count {ALL|user_name}

# To check with particular user’s last password changed
pwdadm -q {user_name}
lssec -f /etc/security/passwd -a lastupdate -s {user_name}
lsuser -a lastupdate {user_name}

## Convert the EPOCH-TIME
perl -le 'print scalar localtime $ARGV[0]' {epochtime}

# Reset unsucessful login counter
chsec -f /etc/security/lastlog -a unsuccessful_login_count=0 -s {user_name}

# Unlock the locked account
chuser account_locked=false {user_name}

# Lock account
chuser account_locked=true {user_name}

# List the locked accounts
lsuser ALL | sed -n '/account_locked=true/p' | sed '/sshd/d' | awk '{print $1}'
登入失敗後自動鎖定
- 可指定帳號或全域設定
- 注意:retry 的次數是累計制,登入成功一次,計數不會歸零
- 解鎖方式是歸零登入失敗的計數
chuser loginretries=5 <username>
lsuser -a loginretries <username>
系統密碼算法
檢查目前系統設置: /etc/security/login.cfg,預設不會有 pwd_algorithm 這項,AIX 使用 crypt 函數對密碼進行加密,更多資訊請前往: Traditional password crypt function
usw:
			shells = /bin/sh,/bin/bsh,/bin/csh,/bin/ksh,/bin/tsh,/bin/ksh93
			maxlogins = 32767
			logintimeout = 60
			maxroles = 8
			auth_type = STD_AUTH
			pwd_algorithm = ssha256
檢查系統有支援的密碼算法
- 檢視檔案:
/etc/security/pwdalg.cfg,預設有 smd5, ssha1, ssha256, ssha512 這幾項。
變更密碼算法:執行以下指令
chsec -f /etc/security/login.cfg -s usw -a pwd_algorithm=ssha512Mount CD-ROM & ISO
# Mount CD-ROM
mount -V cdrfs -o ro /dev/cd0 /mnt

# Mount/Umount ISO file
loopmount -i aix61_dvd.iso -o "-V cdrfs -o ro" -m /mnt
loopumount -l loop0 -m /mnt
解封 HMC root
Restrictd users to switch to root
# Create a group sysadm
mkgroup sysadm

# Add the user1 that is allowed to su to root into the group sysadm
chgrpmem -m + user1 sysadm
lsgroup sysadm

chsec -f /etc/security/user -s root -a sugroups=sysadm
# Reset to the default, sugroups=ALL
# Alternatively
smitty user
# Change / Show Characteristics of a User
# User Name                              [root]
# SU GROUPS                              [sysadm]
Restricted Shell
針對指定帳號限制登入後的預設 Shell 環境的執行權限
教學:
Defaul Shell:
# Change the default shell for the user to the restricted shell such as rksh or Rsh.
chuser shell=/usr/bin/rksh <user-name>
# OR
chsh <user-name> /usr/bin/rksh
.profile:
# Add the commands that are allowd to run by the user into the directory.
mkdir /usr/bin/restricted
cd /usr/bin/restricted
ln -s /usr/bin/date date

# Create a .profile in the user's home directory and set the PATH environment variable to
# a directory containing all of the commands you want the user to be able to run
export PATH=/usr/bin/restricted
Core dump
# 解析 core file
dbx -C ./core

(dbx) corefile

(dbx) dump

(dbx) quit
System dump
errpt:
67145A39 0413095315 U S SYSDUMP SYSTEM DUMPCopy the dump from the dump device to a file using the savecore command:
savecore .Yes, the period is necessary. It indicates you want the dump copied to your current directory
savecore will copy the dump to your current directory, and name it:
vmcore.0.BZUncompress the dump using the dmpuncompress command:
dmpuncompress vmcore.0.BZLastly, format the dump:
/usr/lib/ras/dmprtns/dmpfmt -c vmcore.0Reading a Dump
kdb vmcore.0 vmunix.0系統效能
Memory - svmon
# For a summary of the top 15 processes using memory on the system
svmon -Pt15 | perl -e 'while(<>){print if($.==2||$&&&!$s++);$.=0 if(/^-+$/)}'
-------------------------------------------------------------------------------
Pid Command Inuse Pin Pgsp Virtual 64-bit Mthrd 16MB
18547096 db2sysc 3956861 12944 282407 4007901 Y Y N
19333470 db2sysc 690873 12944 26772 688572 Y Y N
19726694 db2sysc 271696 12944 6198 287133 Y Y N
13500914 db2sysc 263458 12943 18957 285159 Y Y N
1966448 shlap64 109377 12900 3432 122071 Y N N
13631924 db2vend 105589 12900 597 115784 Y N N
19005734 db2sysc 105082 12902 409 114965 Y Y N
20709798 db2sysc 105071 12900 409 114953 Y N N
20119938 db2sysc 105071 12900 409 114953 Y N N
20185458 db2sysc 105071 12900 408 114953 Y N N
15597848 db2vend 104222 12900 1771 115608 Y N N
21430722 db2sysc 103728 12900 1576 114777 Y N N
21037528 db2sysc 103724 12902 1576 114773 Y Y N
14025064 db2sysc 103696 12900 1608 114777 Y N N
18350424 db2sysc 103696 12900 1608 114777 Y N NSar
如果出現 sar: 0551-201 Cannot open /var/adm/sa/sa09,修復請執行 sar -o /var/adm/sa/sa09 10
# CPU
sar -u 2 10

# Mmeory
sar -r 2 10

# I/O
sar -b 2 10
iostat
iostat 2 10Perl 應用
快速檢查特定模組安裝
perl -e "use LWP::UserAgent;"
perl -e "use DBI;"
HTTP GET request
use LWP::UserAgent;

my $ua = LWP::UserAgent->new;

my $server_endpoint = "http://192.168.1.1:8000/service";

# set custom HTTP request header fields
my $req = HTTP::Request->new(GET => $server_endpoint);
$req->header('content-type' => 'application/json');
$req->header('x-auth-token' => 'kfksj48sdfj4jd9d');

my $resp = $ua->request($req);
if ($resp->is_success) {
    my $message = $resp->decoded_content;
    print "Received reply: $messagen";
}
else {
    print "HTTP GET error code: ", $resp->code, "n";
    print "HTTP GET error message: ", $resp->message, "n";
}
HTTP POST request
use LWP::UserAgent;

my $ua = LWP::UserAgent->new;

my $server_endpoint = "http://192.168.1.1:8000/service";

# set custom HTTP request header fields
my $req = HTTP::Request->new(POST => $server_endpoint);
$req->header('content-type' => 'application/json');
$req->header('x-auth-token' => 'kfksj48sdfj4jd9d');

# add POST data to HTTP request body
my $post_data = '{ "name": "Dan", "address": "NY" }';
$req->content($post_data);

my $resp = $ua->request($req);
if ($resp->is_success) {
    my $message = $resp->decoded_content;
    print "Received reply: $messagen";
}
else {
    print "HTTP POST error code: ", $resp->code, "n";
    print "HTTP POST error message: ", $resp->message, "n";
}
NFS
# List NFS mount-points that were configured in /etc/filesystems
root@aixvm:> lsnfsmnt -l
Name            Nodename   Mount Pt               VFS   Size    Options    Auto Accounting
/dataVol/aix_nfs fedoravm   /mnt/nfs               nfs   --      bg,hard,intr,retry=3,timeo=30,sec=sys yes  no
開機磁區
bootinfo
# 目前開機磁區
bootinfo -v

# 目前開機磁碟
bootinfo -b
bosboot
# 建立可開機的映像檔
bosboot -ad hdisk0
bootlist
# 檢視 normal/service 模式的開機清單
bootlist -m normal -o
bootlist -m service -o

# 設定 normal/service 模式的開機清單
bootlist -m normal hdisk0 hdisk1
bootlist -m service cd0 hdisk1
System Infomation
oslevel -s
7200-05-06-2320prtconf
System Model: IBM pSeries (emulated by qemu)
Machine Serial Number: Not Available
Processor Type: PowerPC_POWER8
Processor Implementation Mode: POWER 8
Processor Version: PV_8_Compat
Number Of Processors: 2
Processor Clock Speed: 1000 MHz
CPU Type: 64-bit
Kernel Type: 64-bit
LPAR Info: 0 aix_on_kvm
Memory Size: 4096 MB
Good Memory Size: 4096 MB
Platform Firmware level: Not Available
Firmware Version: SLOF,HEAD
Console Login: enable
Auto Restart: true
Full Core: false
NX Crypto Acceleration: Not Capable
In-Core Crypto Acceleration: Capable, but not Enabled
...
INSTALLED RESOURCE LIST

The following resources are installed on the machine.
+/- = Added or deleted from Resource List.
*   = Diagnostic support not available.

  Model Architecture: chrp
  Model Implementation: Uni-Processor, PCI bus

+ sys0                                                     System Object
+ sysplanar0                                               System Planar
* vio0                                                     Virtual I/O Bus
* ent0                                                     Virtual I/O Ethernet Adapter (l-lan)
* vsa0                                                     LPAR Virtual Serial Adapter
* vty0                                                     Asynchronous Terminal
* pci0                                                     PCI Bus
* scsi0            qemu_virtio-scsi-pci:0000:00:02.0       Virtio SCSI Client Adapter (f41a0800)
* hdisk4           qemu_virtio-scsi-pci:0000:00:02.0-LW_0  MPIO Other Virtio SCSI Disk Drive
* hdisk5           qemu_virtio-scsi-pci:0000:00:02.0-LW_0  MPIO Other Virtio SCSI Disk Drive
+ L2cache0                                                 L2 Cache
+ mem0                                                     Memory
+ proc0                                                    Processor
+ proc1                                                    Processor
lparstat -i
Node Name                                  : aixvm
Partition Name                             : aix_on_kvm
Partition Number                           : 0
Type                                       : Shared
Mode                                       : Capped
Entitled Capacity                          : 2.00
Partition Group-ID                         : 1
Shared Pool ID                             : 1
Online Virtual CPUs                        : 2
Maximum Virtual CPUs                       : 2
Minimum Virtual CPUs                       : 2
Online Memory                              : 4096 MB
Maximum Memory                             : 4096 MB
Minimum Memory                             : 4096 MB
Variable Capacity Weight                   : 128
Minimum Capacity                           : 2.00
...
uname -L
0 aix_on_kvminittab 管理
# List all items
lsitab -a

# Remove an item
rmitab nim
服務管理
# List all services
lssrc -a
lssrc -a | grep active

# Check the service inetd
lssrc -s inetd
lssrc -ls inetd

# Start/Reload/Stop the service
startsrc -s xntpd
refresh -s xntpd
stopsrc -s xntpd
LPAR Check
# Lists details on the LPAR configuration
lparstat -i
UAK Check (Update Access Key)
# Check UAK (Update Access Key) Expiration
lparstat -u
UTF-8 locales
Check the current locale environment variables.
root@aixvm:> locale
LANG=en_US
LC_COLLATE="en_US"
LC_CTYPE="en_US"
LC_MONETARY="en_US"
LC_NUMERIC="en_US"
LC_TIME="en_US"
LC_MESSAGES="en_US"
LC_ALL=

root@aixvm:> locale -a
C
POSIX
en_US.8859-15
en_US.IBM-858
en_US.ISO8859-1
en_US


root@aixvm:> lslpp -L bos.loc.*
  Fileset                      Level  State  Type  Description (Uninstaller)
  ----------------------------------------------------------------------------
  bos.loc.iso.en_US          7.2.5.0    A     F    Base System Locale ISO Code
                                                   Set - U.S. English
Install the file set for en_US.UTF-8 from AIX Installer ISO
- file set:
bos.loc.utf.EN_US
installp -qaXgY -d <path of install images> bos.loc.utf.EN_USWith smitty
smitty install_all
# Press F4 to select the INPUT device / directory for software
#  Press F4 to select the  SOFTWARE to install
#  Use the    "/" key to search for the fileset name
Applying the locale
root@aixvm:> locale -a
C
POSIX
EN_US.UTF-8
EN_US
en_US.8859-15
en_US.IBM-858
en_US.ISO8859-1
en_US.UTF-8
en_US

root@aixvm:> chlang -m EN_US.UTF-8 EN_US.UTF-8
# Relogin
root@aixvm:> locale
LANG=EN_US.UTF-8
LC_COLLATE="EN_US.UTF-8"
LC_CTYPE="EN_US.UTF-8"
LC_MONETARY="EN_US.UTF-8"
LC_NUMERIC="EN_US.UTF-8"
LC_TIME="EN_US.UTF-8"
LC_MESSAGES="EN_US.UTF-8"
LC_ALL=
AIX VM with QEMU
Introduction
What can it be used for?
- AIX Training and Practice
- Testing/Developing Environment for AIX
- Cybersecurity Lab for AIX
- Running AIX on your laptop for whatever you want to accomplish
- System/Database Recovery Exercise in compliance with ISO27001 (No Power Servers Required)
Video Tutorials
- Odysee: https://odysee.com/@Linuxfans:d/IBM_AIX_running_on_x86_64:5
- YT: https://www.youtube.com/watch?v=tU94v-vr_J0
Prerequisities:
- QEMU Install
- aix_7200-04-00-1937_1of2_112019.iso
- Fedora 40 Linux Install (Recommended)
Updated by 2025/2/17: AIX 7200-04-00 成功更新到 7200-05-06-2320,使用官方更新程序,時間花費 5 小時 10 分。
QEMU commands
PowerPC System Board-specific
qemu-system-ppc64 --machine helpcobra@fedora-vm:~$ qemu-system-ppc64 --version
QEMU emulator version 8.2.6 (qemu-8.2.6-3.fc40)
Copyright (c) 2003-2023 Fabrice Bellard and the QEMU Project developers這版的 QEMU 已經修復了 ps, crontab, cron, java 指令問題。
Install AIX from CD-ROM
Create a VM disk
mkdir aix72VM
cd aix72VM
qemu-img create -f  qcow2  hdisk0.qcow2  20G
注意: AIX 版本必須 7200-03-00 以後版本才有支援。
aix_7200-04-00-1937_1of2_112019.iso
cd aix72VM
mv aix_7200-04-00-1937_1of2_112019.iso AIX72.iso
Boot from cd-rom
cd aix72VM
qemu-system-ppc64 -cpu POWER8 \
-machine pseries -m 4096 -serial stdio \
-drive file=hdisk0.qcow2,if=none,id=drive-virtio-disk0 \
-device virtio-scsi-pci,id=scsi \
-device scsi-hd,drive=drive-virtio-disk0 \
-cdrom $PWD/AIX72.iso \
-prom-env "boot-command=boot cdrom:" \
-prom-env "input-device=/vdevice/vty@71000000" \
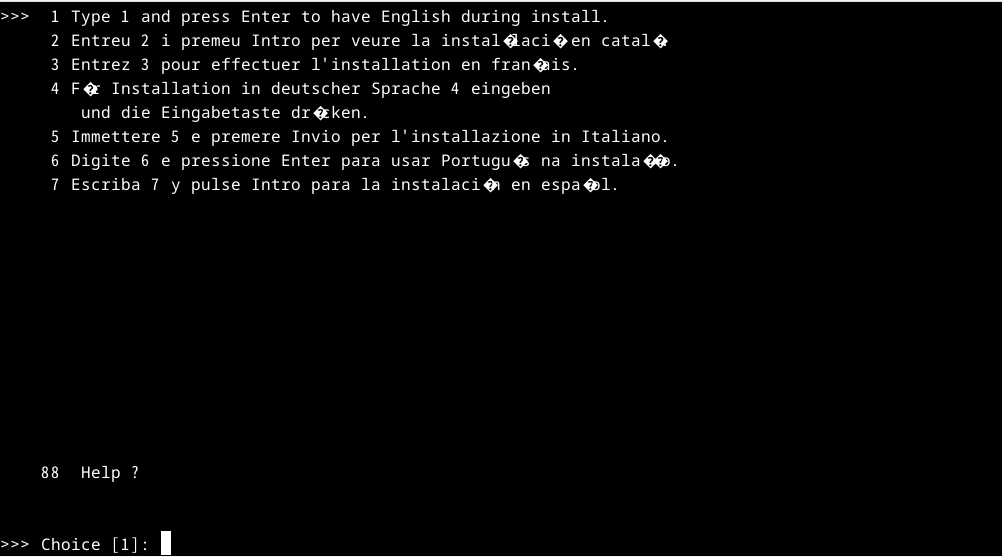
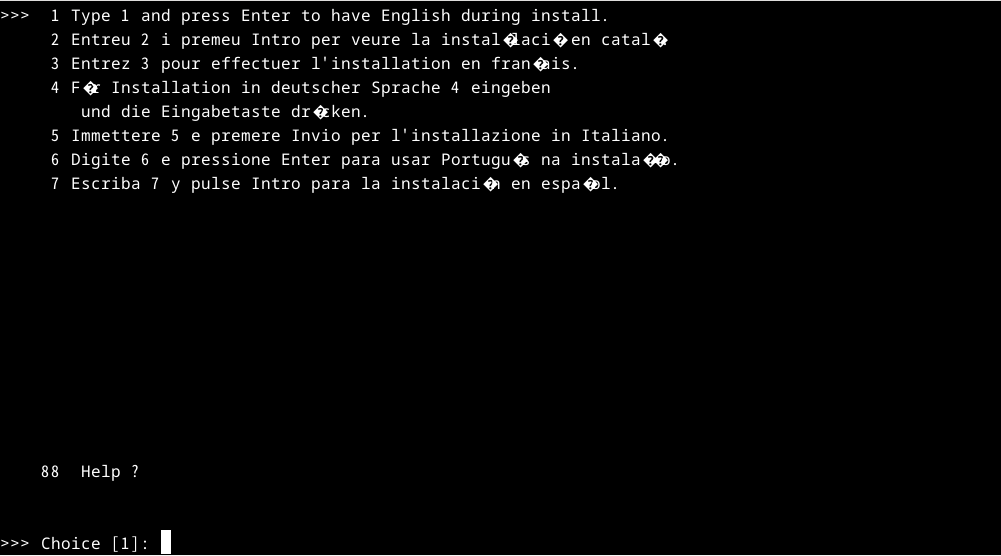
-prom-env "output-device=/vdevice/vty@71000000"Type 1 and press Enter

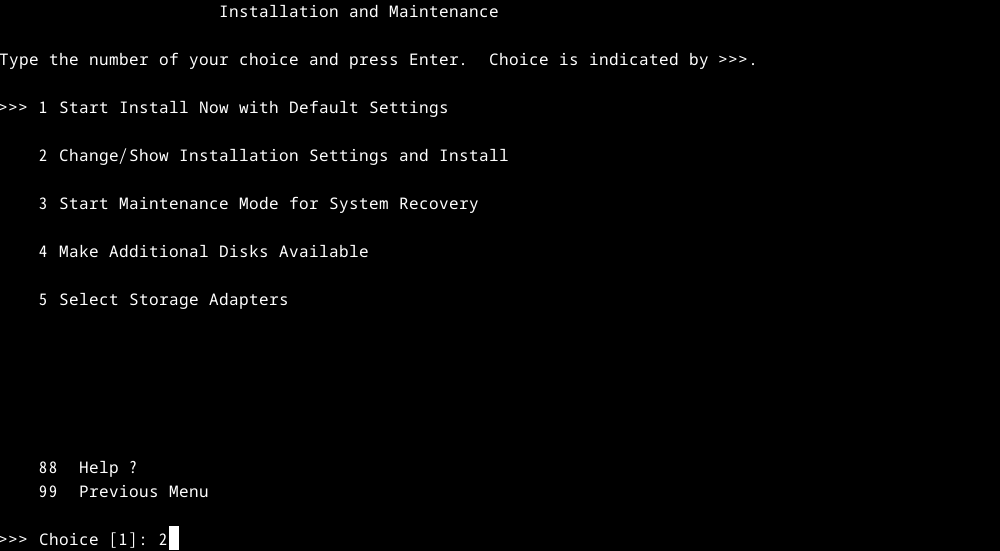
Press Enter
Type 2
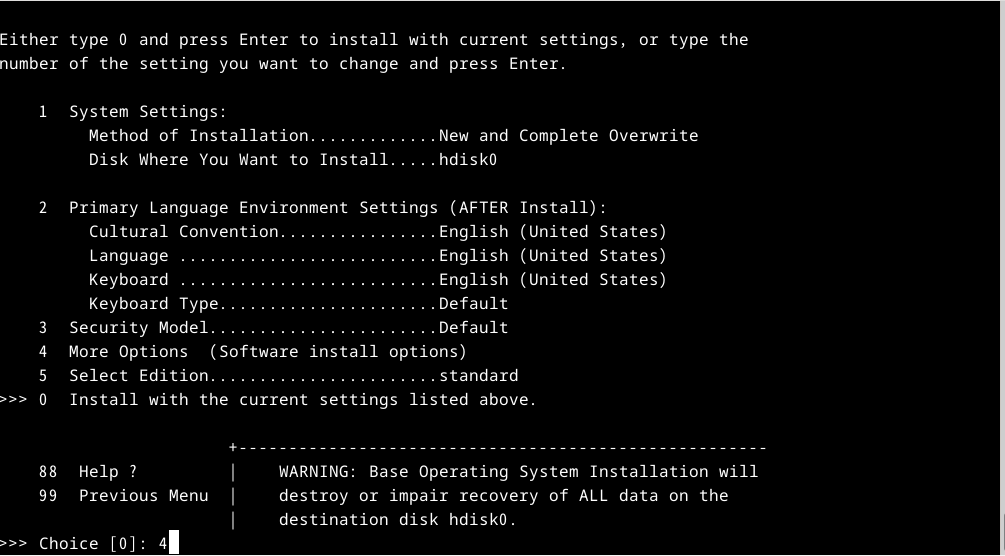
Type 4
Type 5
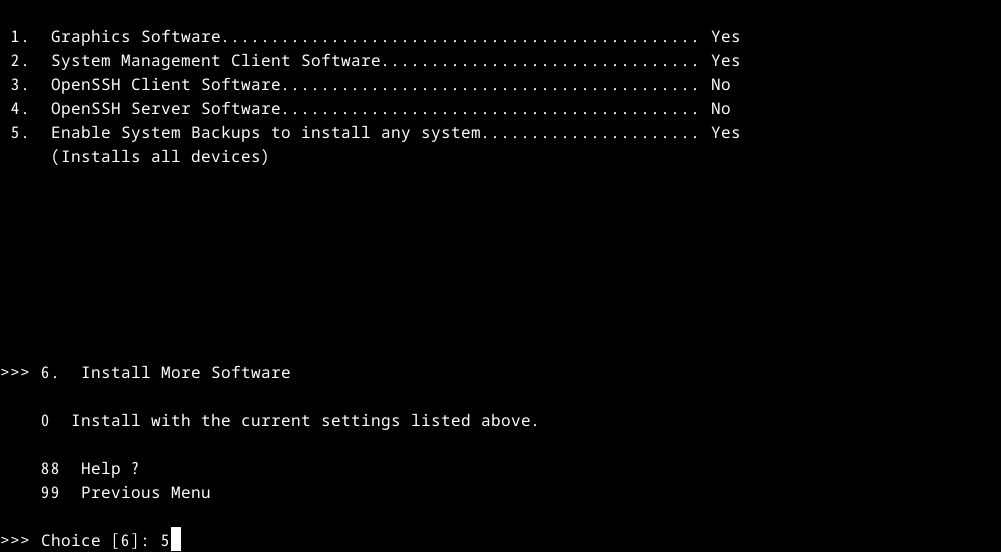
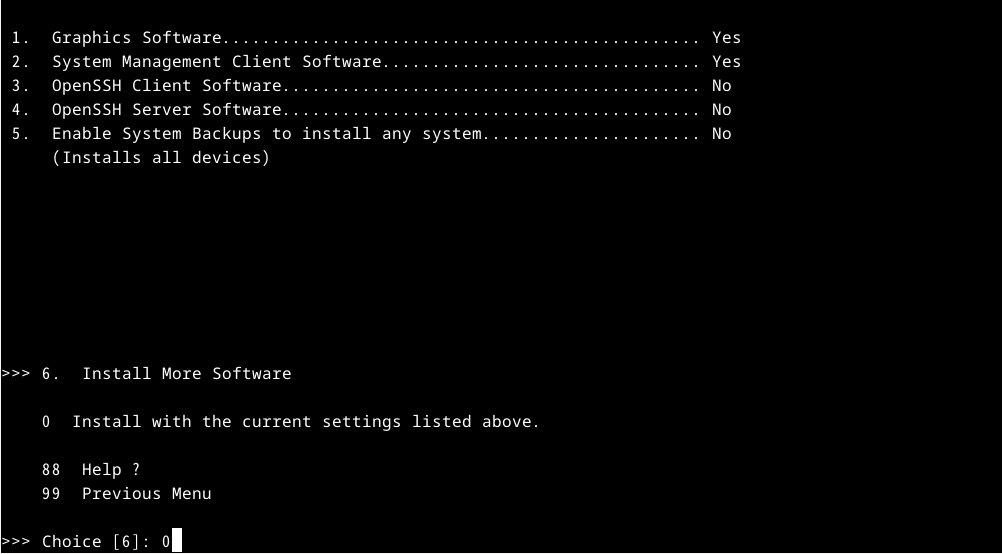
Type 0
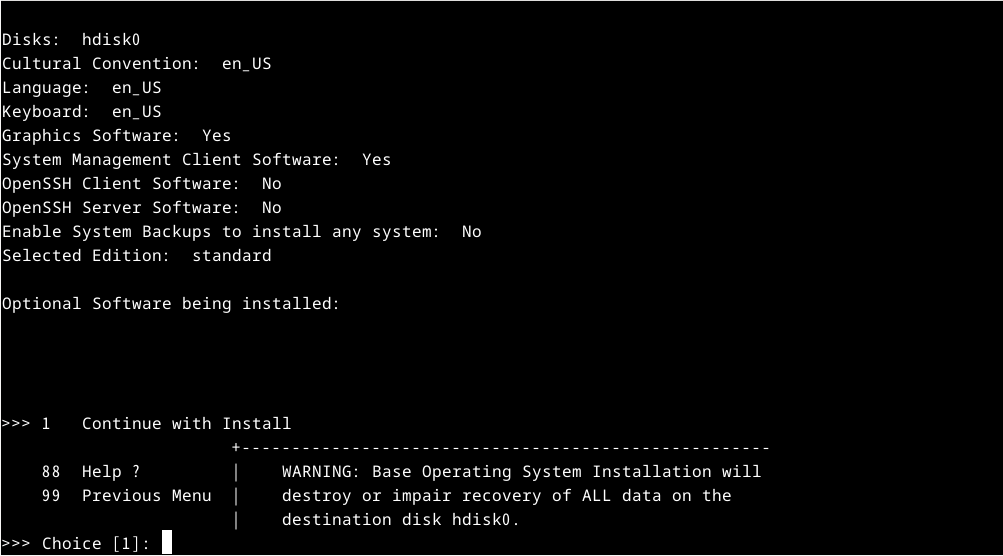
Press Enter to install AIX
看到這畫面時,表示 AIX 作業系統已經完成安裝。
輸入 Ctrl + C 離開

Fix boot issue
Boot from cd-rom
cd aix72VM

qemu-system-ppc64 -cpu POWER8 \
-machine pseries -m 4096 -serial stdio \
-drive file=hdisk0.qcow2,if=none,id=drive-virtio-disk0 \
-device virtio-scsi-pci,id=scsi \
-device scsi-hd,drive=drive-virtio-disk0 \
-cdrom $PWD/AIX72.iso \
-prom-env "boot-command=boot cdrom:" \
-prom-env "input-device=/vdevice/vty@71000000" \
-prom-env "output-device=/vdevice/vty@71000000"
Type 1 and press Enter

Press Enter
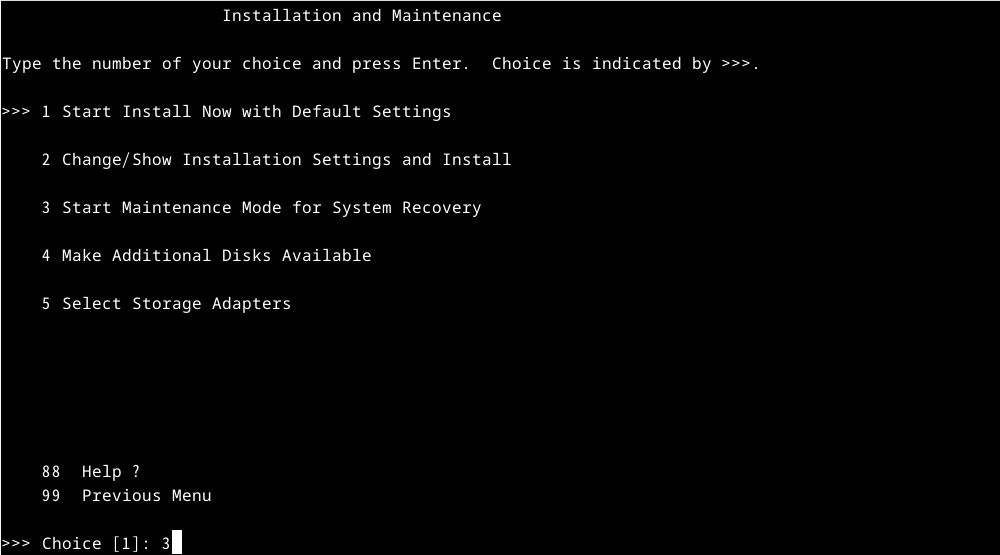
Type 3
Type 0
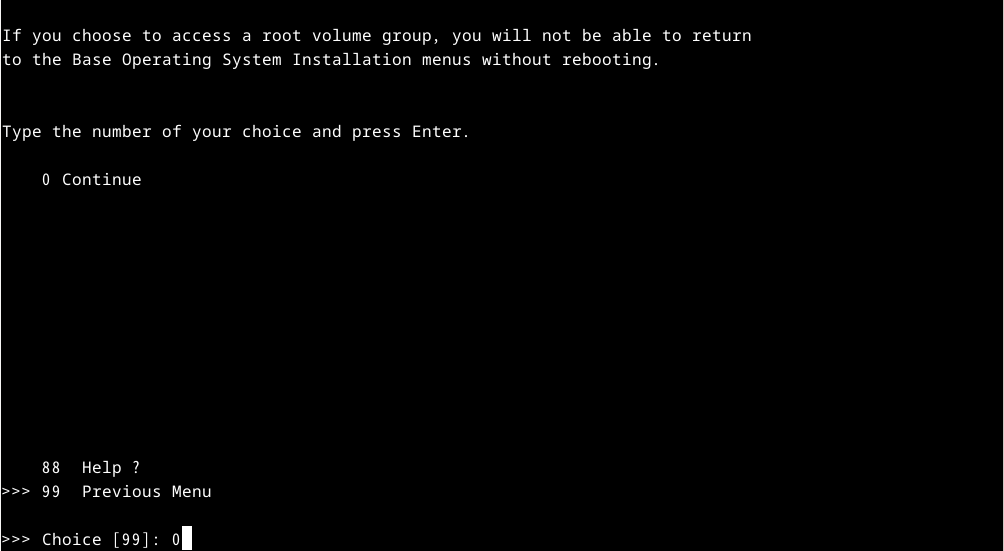
Type 1
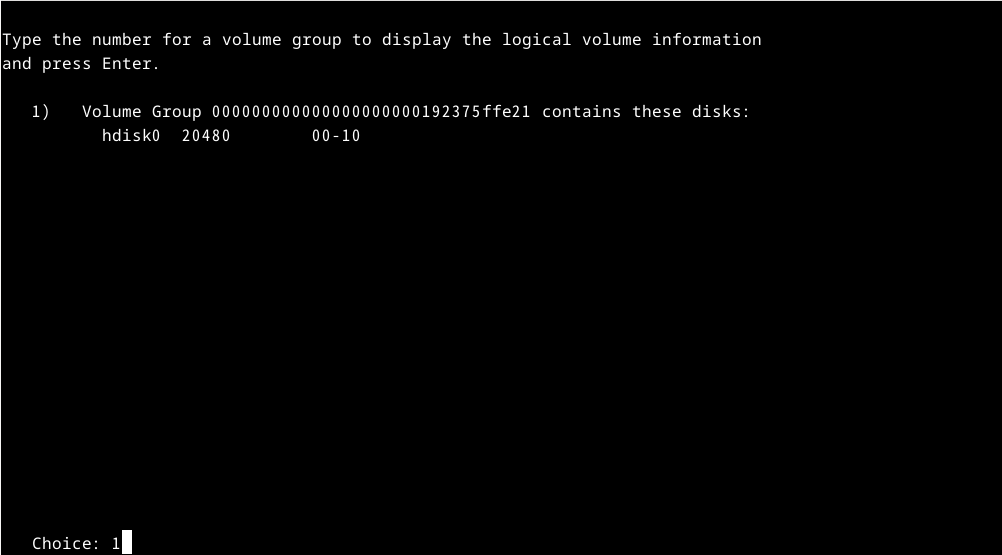
Type 1

輸入修復開機指令
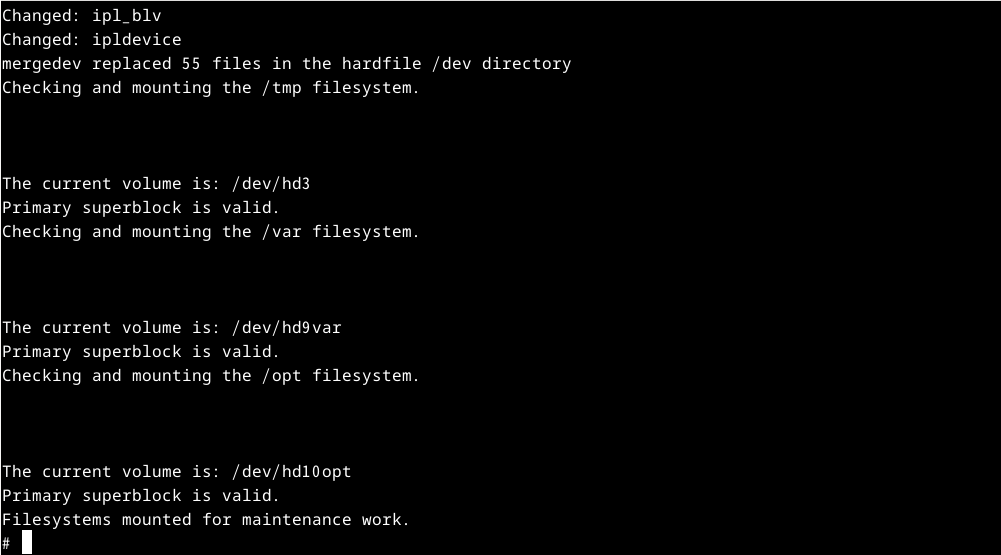
Fix boot issue
cd /sbin/helpers/jfs2
mv fsck64 fsck64.old
ln -s fsck fsck64

mv logredo64 logredo64.old
ln -s logredo logredo64

sync;sync;
halt
First boot from hdisk
cd aix72VM

qemu-system-ppc64 -cpu POWER8 \
-machine pseries -m 4096 -serial stdio \
-drive file=hdisk0.qcow2,if=none,id=drive-virtio-disk0 \
-device virtio-scsi-pci,id=scsi \
-device scsi-hd,drive=drive-virtio-disk0 \
-cdrom $PWD/AIX72.iso \
-prom-env "boot-command=boot hdisk:" \
-prom-env "input-device=/vdevice/vty@71000000" \
-prom-env "output-device=/vdevice/vty@71000000"
Type vt100
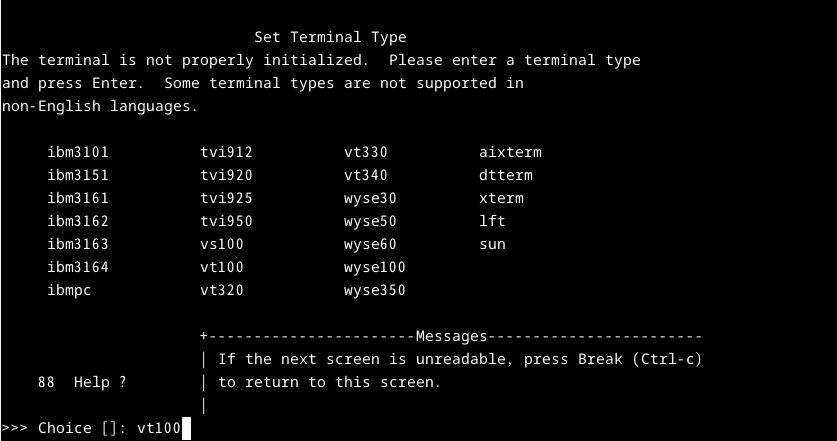
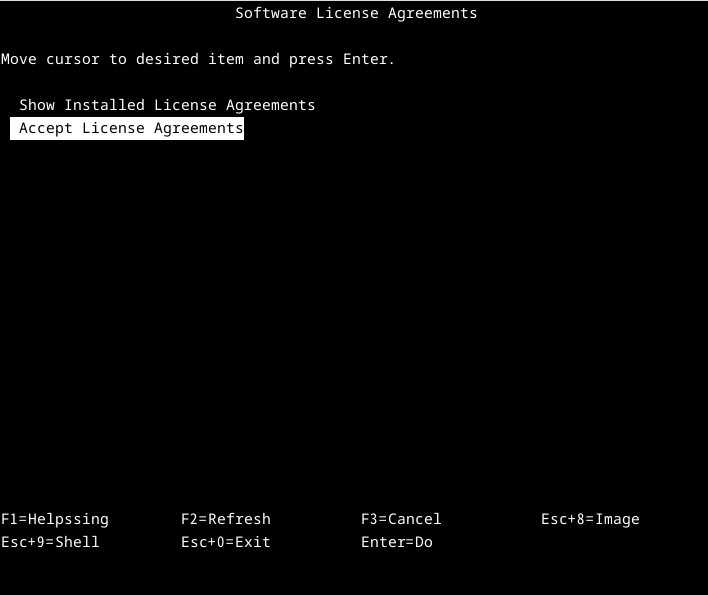
Select: Accept License Agreements
Tips: 如果這裡的畫面出現沒有對齊的情況,且影響到後續的操作。按下 Ctrl + C 先中斷離開,將終端機的字形調更小,然後再重新執行步驟。
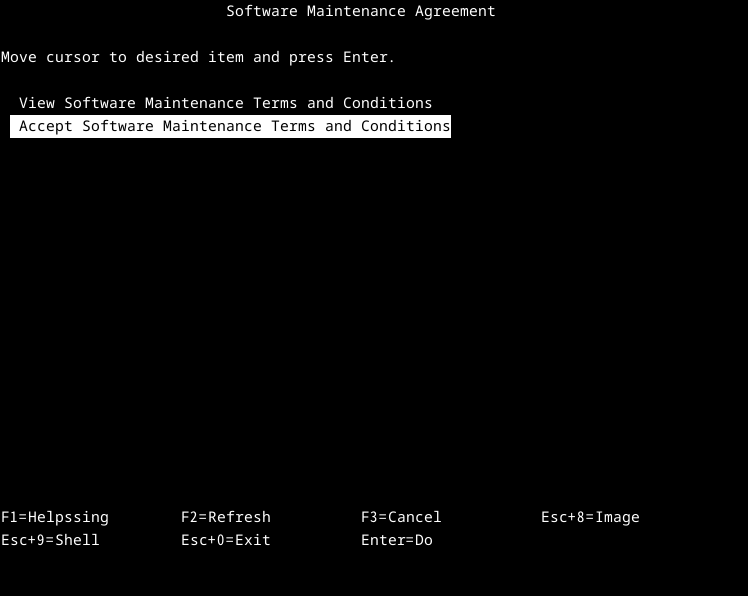
Select: Accept Software Maintenance Terms and Conditions
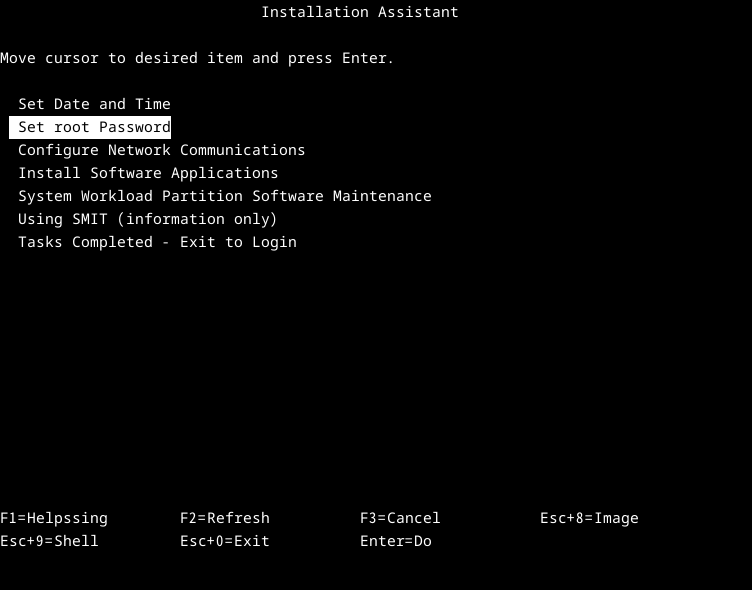
Select: Set root Password
Tip: 設定完密碼後,最後要選擇 Task Completed - Exit to Login。如果略過這,下次在開啟系統時,初始化的步驟仍會再出現。
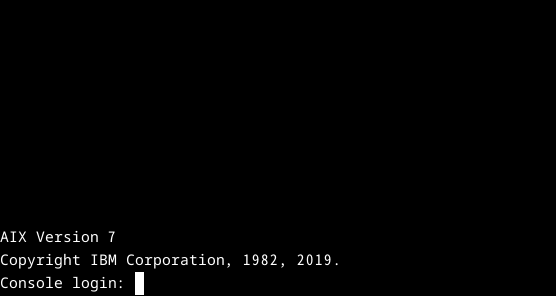
用剛剛設定的 root 帳密登入
Post-tasks
- Disable some problematic services
rmitab diagd
rmitab rcnfs
rmitab aso
rmitab clcomd
rmitab pfcdaemon
stopsrc -s clcomd
stopsrc -s pfcdaemon

lsitab -a
lssrc -a
- Network setup
On Linux)
net_tap.sh:
BRIDGE=virbr0
NETWORK=192.168.99.0
NETMASK=255.255.255.0
GATEWAY=192.168.99.1
DHCPRANGE=192.168.99.2,192.168.99.50
TAP=tap0

sudo ip link add $BRIDGE type bridge
sudo ip link set dev $BRIDGE up
sudo ip addr add dev $BRIDGE $GATEWAY/$NETMASK

sudo ip tuntap add $TAP mode tap
sudo ip link set $TAP master $BRIDGE
sudo ip link set up dev $TAP

# Uncomment the following lines to enable the DHCP server
#dns_cmd=(
#    dnsmasq
#    --strict-order
#    --except-interface=lo
#    --interface=$BRIDGE
#    --listen-address=$GATEWAY
#    --bind-interfaces
#    --dhcp-range=$DHCPRANGE
#    --conf-file=""
#    --pid-file=/var/run/qemu-dnsmasq-$BRIDGE.pid
#    --dhcp-leasefile=/var/run/qemu-dnsmasq-$BRIDGE.leases
#    --dhcp-no-override
#)
#echo ${dns_cmd[@]} | sudo bash
Run net_tap.sh
bash net_tap.shAllow access to internet
sudo firewall-cmd --permanent --zone=public --add-interface=tap0
sudo firewall-cmd --permanent --add-masquerade
sudo firewall-cmd --reload
Boot with network interface tap0
qemu-system-ppc64 -cpu POWER8 \
  -machine pseries -m 4096 -serial mon:stdio \
  -drive file=hdisk0.qcow2,if=none,id=drive-virtio-disk0 \
  -device virtio-scsi-pci,id=scsi \
  -device scsi-hd,drive=drive-virtio-disk0 \
  -cdrom $PWD/AIX72.iso \
  -net nic -net tap,script=no,ifname=tap0 \
  -prom-env "boot-command=boot disk:" \
  -nographic
On AIX)
# Check the network interface
lsdev -Cc if
lsdev -Cc adapter

# Set the ip
chdev -l en0 -a netaddr=192.168.99.100 -a netmask=255.255.255.0 -a state=up
route add 0 192.168.99.1
# Alternatively, using the following command instead
/usr/sbin/mktcpip -h'aixvm' -a'192.168.99.100' -m'255.255.255.0' -i'en0' -g'192.168.99.1' -A'no' -t'N/A'

echo "nameserver 1.1.1.1" > /etc/resolv.conf
- Increase the filesystem size
lsdev -Cc disk
lscfg -vl hdisk0
chfs -a size=+1024M /home
chfs -a size=+2048M /opt
chfs -a size=+512M /tmp
chfs -a size=+2048M /usr
chfs -a size=+1024M /var
- Install OpenSSH
mount  -v  cdrfs  -o  ro  /dev/cd0  /mnt
mkdir   /tmp/ssh_install
cd  /mnt/installp/ppc
cp  openssh*  /tmp/ssh_install
cd  /tmp/ssh_install
installp -acgXYd . openssh.base openssh.license openssh.man.en_US openssh.msg.en_US
lssrc  -s  sshd
- Fix the RPM issue
error: cannot open Packages index using db4 - Invalid argument (22)
error: cannot open Packages database in /opt/freeware/packages
error: db4 error(22) from dbenv->open: Invalid argument
Solution: fixrpm.sh
#!/usr/bin/ksh

cd /opt/freeware
rm -f *.rpm.packages.tar
tar -chvf `date +"%d%m%Y"`.rpm.packages.tar packages
rm -f /opt/freeware/packages/__*
/usr/bin/rpm --rebuilddb

exit 0
Edit /etc/initab, insert the line after the rctcpip
rctcpip:23456789:wait:/etc/rc.tcpip > /dev/console 2>&1 # Start TCP/IP daemons
fixrpm:23456789:once:/fixrpm.sh > /dev/null 2>&1 # Added by Alang
- Install AIX Toolbox
Download the files
- dnf_aixtoolbox.sh : https://public.dhe.ibm.com/aix/freeSoftware/aixtoolbox/ezinstall/ppc/dnf_aixtoolbox.sh
- openssl-1.1.2.2000.tar.Z : https://www.ibm.com/resources/mrs/assets?source=aixbp&S_PKG=openssl
cd /home/worktmp
uncompress openssl-1.1.2.2000.tar.Z
tar -xvf openssl-1.1.2.2000.tar
cd openssl-1.1.2.2000
installp -qaXFY -d . openssl.base openssl.license openssl.man.en_US
openssl version
cd /home/worktmp
rpm --rebuilddb
ksh dnf_aixtoolbox.sh -y
/opt/freeware/bin/dnf update
/opt/freeware/bin/dnf install bash- Optional tasks
> Custom the prompt, create the profile /.profile
PS1="`whoami`@`hostname -s`:"'${PWD##*/}> '> Timezone
smitty > System Environments > Change/Show Date and Time > Change Time Zone Using System
echo $TZ> The ordering of certain name resolution services
修復 ping 本地主機名時會回應遲鈍問題。
Edit: /etc/netsvc.conf
hosts = local, bind4> Set the environment variables
Edit: /etc/environment
# Fix for not properly displaying with smitty on the tmux
TERM=xterm
其他管理工作
- 掛載 CD ISO 檔
修改qemu 啟動參數 -cdrom /path/to/your-cd.iso
qemu-system-ppc64 -cpu POWER8 \
  -machine pseries -m 4096 -serial mon:stdio \
  -drive file=hdisk0.qcow2,if=none,id=drive-virtio-disk0 \
  -device virtio-scsi-pci,id=scsi \
  -device scsi-hd,drive=drive-virtio-disk0 \
  -cdrom $PWD/AIX72.iso \
  -net nic -net tap,script=no,ifname=tap0 \
  -prom-env "boot-command=boot disk:" \
  -nographic
AIX 掛載指令
mount -v cdrfs -o ro /dev/cd0 /mnt- 增加第2顆虛擬硬碟
在 Linux 主機:新增 5G 虛擬磁碟 hdisk1.qcow2
cd aix72VM
qemu-img create -f qcow2 hdisk1.qcow2 5G
修改啟動指令,新增兩行參數
注意:之後如有變更參數的 disk id 名稱,啟動後 AIX 內的 hdisk 編號也會變動。
-drive file=hdisk1.qcow2,if=none,id=drive-virtio-disk1 \
-device scsi-hd,drive=drive-virtio-disk1 \
在 AIX 主機:檢視硬碟 hdisk1
root@aixvm:> lspv
hdisk0 00000000375ffb46 rootvg active
hdisk1 00000000fdb40f0f rootvg active
root@aixvm:> lsdev -Cc disk
hdisk0 Available 00-10 MPIO Other Virtio SCSI Disk Drive
hdisk1 Available 00-10 MPIO Other Virtio SCSI Disk Drive
root@aixvm:> lsmpio -q
Device Vendor Id Product Id Size Volume Name
---------------------------------------------------------------------------------
hdisk0 QEMU QEMU HARDDISK 20.00GiB -
hdisk1 QEMU QEMU HARDDISK 20.00GiB -
root@aixvm:> lspv -u
hdisk0 00000000375ffb46 rootvg active 33130drive-virtio-disk00DQEMU HARDDISK04QEMUvrtscsi 8eca6bf6-b924-0872-c039-8cb2a62de21a
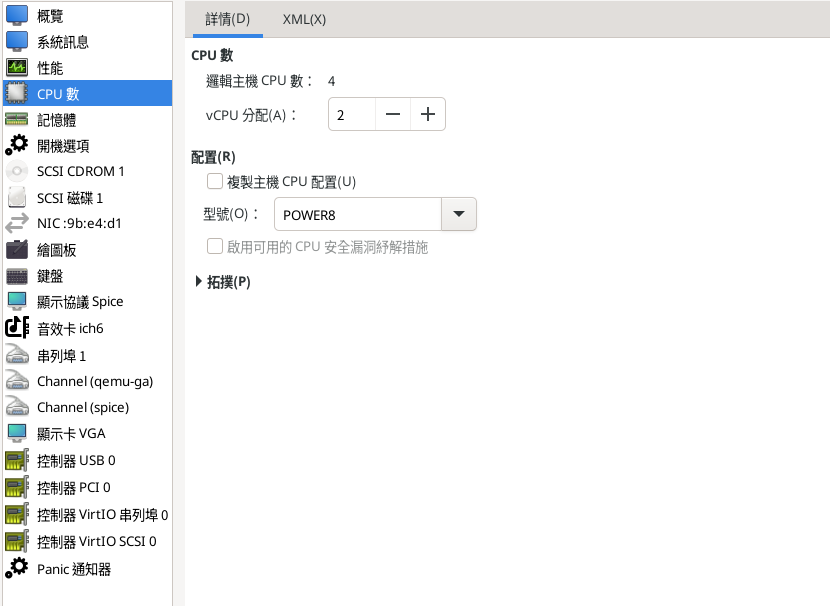
hdisk1 00000000fdb40f0f rootvg active 33130drive-virtio-disk10DQEMU HARDDISK04QEMUvrtscsi c618c61a-8c74-19e4-6cfa-beae464aaf14- 增加更多 vCPU
預設 QEMU 只有 1 vCPU,要改善 AIX 的效能,可以視硬體等級增加更多 vCPU。
qemu-system-ppc64 啟動參數加上
-nographic -smp 2,sockets=2,cores=1,threads=1- 增加虛擬網卡裝置
qemu-system-ppc64 啟動參數設置兩個虛擬網卡
-net nic \
-net nic \
-net tap,script=no,ifname=tap0 \
如果要榜定 mac addr.
-net nic,macaddr=56:44:45:30:31:31 \
-net nic,macaddr=56:44:45:30:31:32 \
-net tap,script=no,ifname=tap0 \
- 設定 CPU 類型
POWER 8
-cpu POWER8 -machine pseriesPOWER 9
-cpu POWER9 -machine pseries,ic-mode=xics- 完整啟動參數
qemu-system-ppc64 -cpu POWER8 \
  -machine pseries -m 4096 -serial mon:stdio \
  -cdrom $PWD/AIX72.iso \
  -device virtio-scsi-pci,id=scsi \
  -drive file=hdisk0.qcow2,if=none,id=drive-virtio-disk0 \
  -device scsi-hd,drive=drive-virtio-disk0 \
  -drive file=hdisk1.qcow2,if=none,id=drive-virtio-disk1 \
  -device scsi-hd,drive=drive-virtio-disk1 \
  -net nic -net tap,script=no,ifname=tap0 \
  -prom-env "boot-command=boot disk:" \
  -nographic -smp 2,sockets=2,cores=1,threads=1
- NFS Share
- NFS Server: Fedora VM (192.168.99.1)
- NFS Client: AIX VM (192.168.99.100)
NFS Server on Fedora VM)
# Install the dependencies packages
[cobra@fedora-vm ~]$ rpm -qa | grep nfs
libnfsidmap-2.7.1-0.fc40.x86_64
sssd-nfs-idmap-2.9.5-1.fc40.x86_64
nfs-utils-2.7.1-0.fc40.x86_64


# Configure the firewall
sudo firewall-cmd --permanent --add-service=nfs
sudo firewall-cmd --permanent --add-service=mountd
sudo firewall-cmd --permanent --add-service=rpc-bind
sudo firewall-cmd --reload
Edit /etc/exports.d/aix_nfs.exports
/dataVol/aix_nfs 192.168.99.100(rw,sync,no_root_squash)Startup the service
[cobra@fedora-vm ~]$ sudo systemctl enable nfs-server --nowNFS Client on AIX VM)
- IP: 192.168.99.1 這是 AIX 的 Gateway,同時也是外層 Fedora 的 IP。
showmount -e 192.168.99.1
mkdir /mnt/nfs
mount 192.168.99.1:/dataVol/aix_nfs /mnt/nfs
系統效能
實測數據
- AIX 更新: 從 7200-05-06-2320 至 7200-05-08-2420,更新檔約 8 GB,共花費時間 2.5 小時。
- AIX 更新: 從 7200-04-00-0000 至 7200-05-06-2320,更新檔約 7.9GB,總花費時間 5 小時 10 分。
- DB2 Server: 安裝 v11.1 花費 51 分鐘,安裝 FP 7 花費 1.5 小時。
I/O 優化
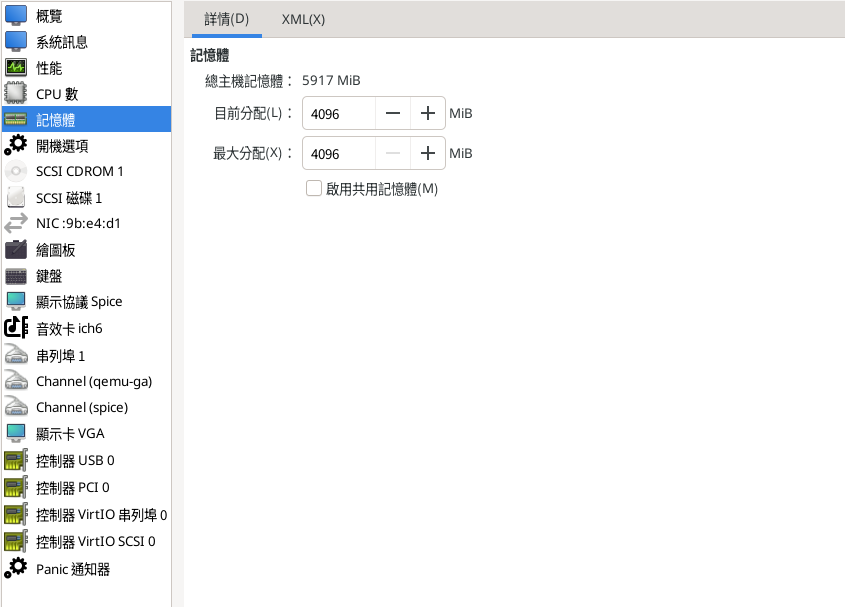
- AIX 分配 4GB RAM 時,外層 Fedora Linux 建議 12 GB以上 RAM,可避免 Fedora Linux 使用 SWAP memory,以致影響 AIX 的 I/O 效能。
- 如果 Fedora Linux 啟用多個 AIX VMs,Fedora Linux 記憶體配置需要適時地增加。
- 外部電腦要與 AIX 進行檔案交換時,可使用 scp 指令。盡可能不要使用 Fedora Linux 做中繼,因為 Fedora Linux 同時間要執行寫入與讀取,會影響檔案傳輸的效率。
磁區建議最小空間分配
- / : 1GB
- /usr : 5GB
- /var : 1.5GB
- /tmp : 1GB
- /opt : 7GB (For DB2 Server)
遷移現有的 AIX 系統
已知問題
- 執行
lslpp -L時偶爾會卡住,可以改用-l取代或重啟 AIX VM 試試。 - 使用 DB2 Server 11.1 時,在安裝 FixPack 與建立 Instance 時會發生錯誤,需要使用 db2chgpath 指令修復。
- 如果 AIX 頻繁增刪檔案,外層的 VM disk hdisk0.qcow2 檔案會不斷增大,即使 AIX 刪除了所有檔案,hdisk0.qcow2 檔案也不會自動縮小。
- 解決方法:關閉 AIX VM,在 Host OS 使用指令
virt-sparsify hdisk0.qcow2 hdisk0-shrink.qcow2,然後使用 hdisk0-shrink.qcow2 當作 AIX VM disk。
- 解決方法:關閉 AIX VM,在 Host OS 使用指令
References
- AIX on qemu-system-ppc64
- Run AIX 7.2 on x86 with QEMU – Kwakou SysAdmin
- Qemu模拟器运行AIX 7.2 系统 - 运维小菜鸟 - 博客园 (cnblogs.com)
- Run your AIX VM on x86 using KVM and QEMU (ibm.com)
- qemu7模拟安装aix72,详细过程,附带镜像_aix 7.2版本qcow2格式镜像下载-CSDN博客
- AIX 7.2 虚拟机安装 - 杰哥的{运维,编程,调板子}小笔记 (jia.je)
- AIX for System Administrators: DEVOPS - QEMU (aix4admins.blogspot.com)
- YT: AIX 7.2 installation in QEMU - YouTube
- YT: Install AIX on QEMU using virsh and virt-manager tools - YouTube
- YT: Updates on Install AIX and run PowerHA using virsh and virt-manager - YouTube
- libvirt: QEMU command-line passthrough
- Install AIX on x86 using QEMU
Learning
Tutorials
- YT: Aix administration - YouTube
- YT: online AIX training for beginners - YouTube
- YT: AIX in Focus - YouTube
- YT: IBM AIX - YouTube
- Chris's AIX Blog
Open Source Packages
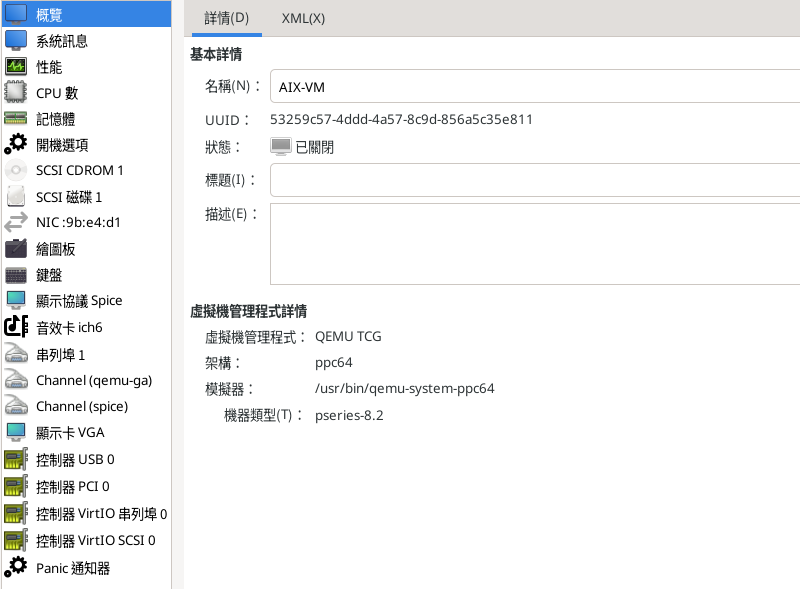
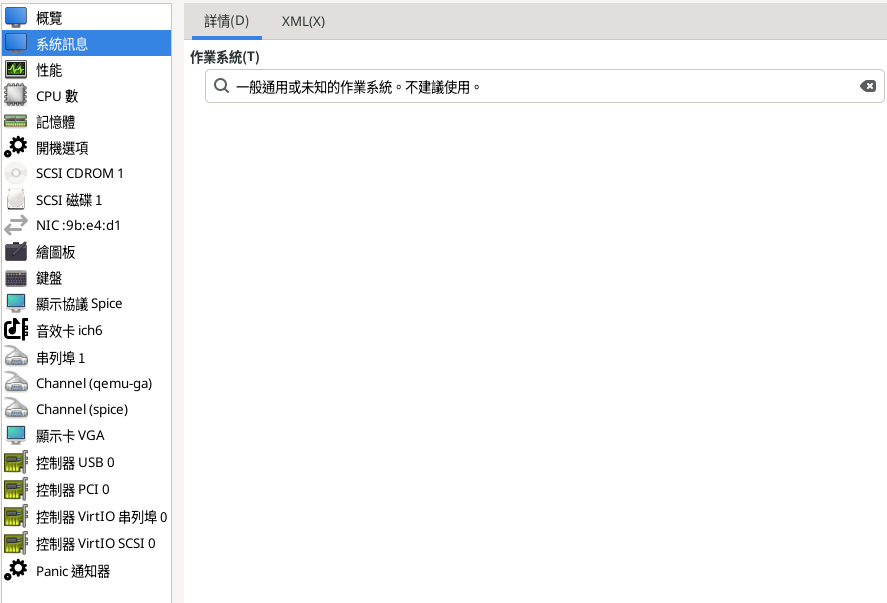
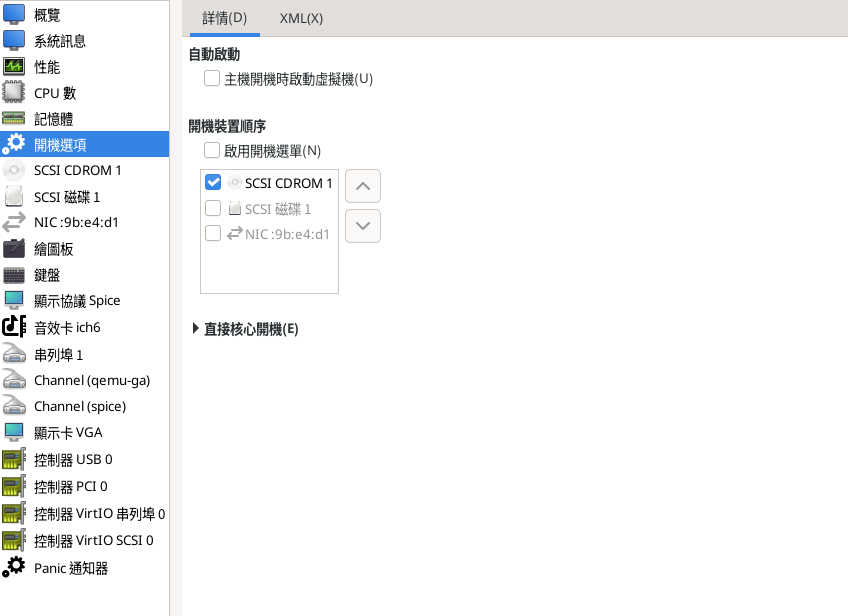
AIX VM with virt-manager
技巧
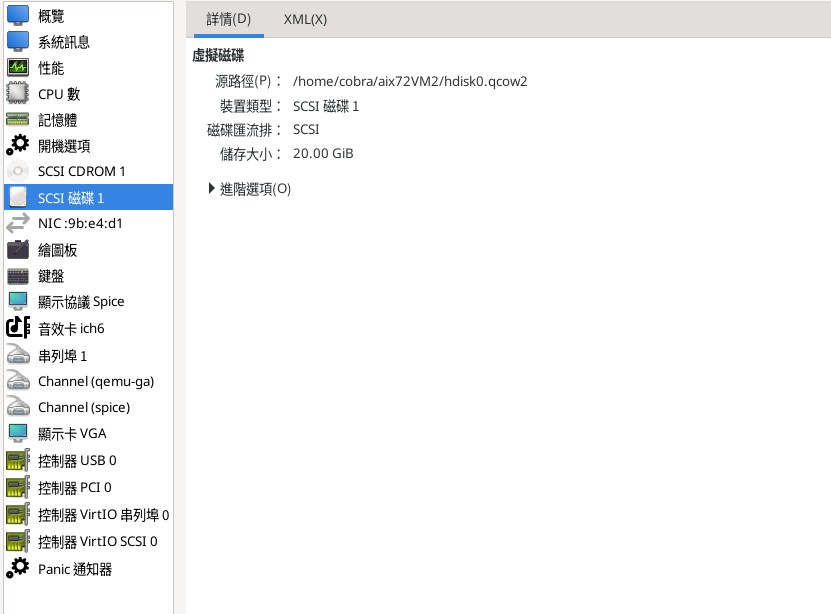
- AIX系統的虛擬磁碟 hdisk0 ,裝置類型必須是 SCSI 磁碟,並且使用指令先建立
qemu-img create -f qcow2 hdisk0.qcow2 20G,磁碟大小可自行調整。 - 修改 xml 檔時,可以在 virt-manager 介面上操作,或者以指令模式替代。指令是
virsh edit <vm-name>。
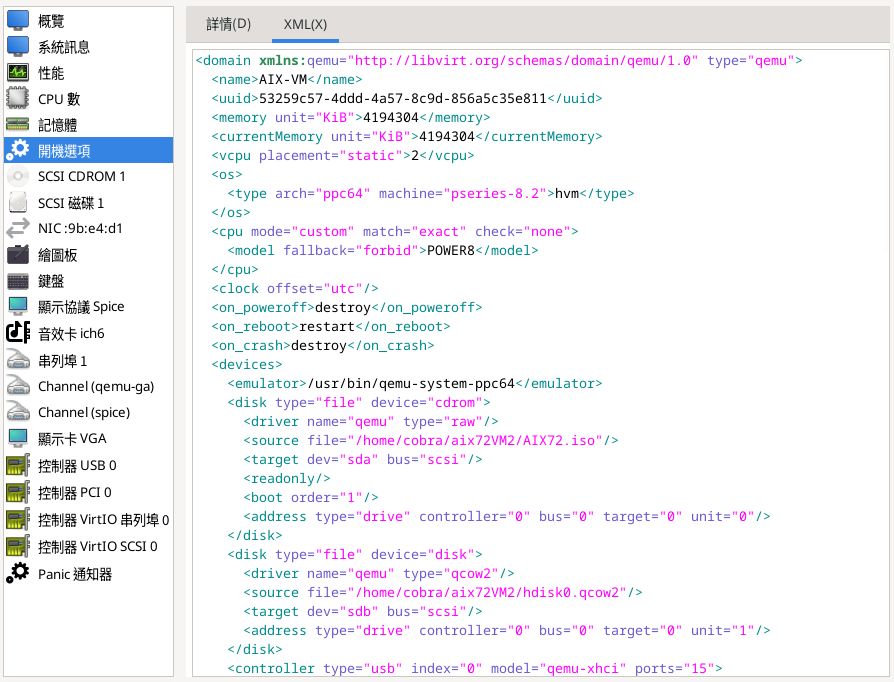
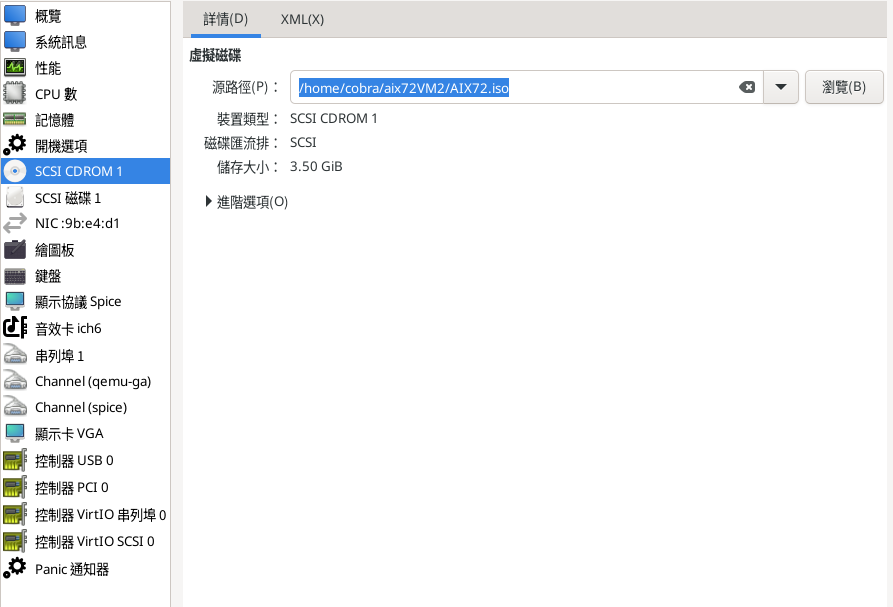
XML
- 修改 iso 檔路徑
- XML 檔增加第一行
<domain type=....>與<qemu:comandline> .... </qemu:commandline>
<domain type='qemu' xmlns:qemu='http://libvirt.org/schemas/domain/qemu/1.0'>
...
  <devices>
  ...
  </devices>
  <qemu:commandline>
    <qemu:arg value='-prom-env'/>
    <qemu:arg value='boot-command=boot cdrom:'/>
    <qemu:arg value='-cdrom'/>
    <qemu:arg value='/home/cobra/aix72VM2/AIX72.iso'/>
  </qemu:commandline>
</domain>
VM Configuration
Update Fixpack & Interim Fix
Update 7200-04-00-0000 to 7200-05-06-2320
Update Fixpacks
Download
- Instruction: https://www.ibm.com/support/pages/updating-new-technology-level-or-service-pack
- Download: https://www.ibm.com/support/fixcentral/aix/selectFixes?release=7.2&function=release
下載注意事項:
- 提供機型與機號的資訊,且下載版本須相符合約裡的機型機號。
- 需要登入 IBMid,且過程中需要 Email 驗證。
- 變更下載選項
- HTTPS 下載
- 請勾選 ISO 格式 (檔案約 7-8 GB)
Pre-Checks
1.System Backup
備份 VG: rootvg 至其他未使用的 PV,PV 空間需相等或足夠 rootvg 的使用。
# 複製 VG: rootvg 至 hdisk1, 請確認 hdisk1 無重要資料
alt_disk_copy -B -d hdisk1
NOTE: 如果 VG: rootvg 有兩個 PV 做 Mirror,須改用以下指令:
# 複製 rootvg 至 hdisk6
mkszfile
sed 's/COPIES= [2-3]/COPIES= 1/g' /image.data > /image.data.one_copy
nohup alt_disk_copy -B -i /image.data.one_copy -d hdisk6 > clonelog.log &
Optional: 如果目的 PV 曾經做過備份,執行以下指令先做 VG 卸載
exportvg hdisk62.Boot Image Verification
檢查目前開機磁碟位置: hd5 是預設開機磁區
root@aixvm:> lslv -m hd5

hd5:N/A
LP    PP1  PV1               PP2  PV2               PP3  PV3
0001  0001 hdisk0
3.Firmware
It is recommended to check and update the firmware level when a technology level update is being considered. In general, it's best to apply firmware updates before software updates, but that is not always the case.
4.Fileset Consistency
Ideally, it returns to the command line with no output. If you receive output and are unfamiliar with how to resolve it, call the support center for assistance before running your update.
lppchk -vInstall the fixpacks
掛載更新檔: H11072988.iso
mkdir /mnt/iso
loopmount -i H11072988.iso -o "-V cdrfs -o ro" -m /mnt/iso
1. Commit Applied Software Updates
將前一次的更新執行 commit,這樣可以釋出一些可用磁碟空間
smitty > Software Installation and Maintenance > Software Maintenance and Utilities > Commit Applied Software Updates
2.先更新Installp
如果目前版本與要更新的版本,中間跨了許多版本,建議先更新安裝程式 installp,可以避免更新失敗。
# Check if any EFIX installed, if so, remove it before update.
lslpp -e
emgr -r -L <EFIX-Label>

# Using smitty
smitty install_latest

# Using CLI
installp -acd /mnt/iso bos.rte.install

# Check the version
lslpp -L | grep bos.rte.install- INPUT device / directory for software : [/mnt/iso]
- SOFTWARE to update : bos.rte.install
- PREVIEW only? (install operation will NOT occur) : no
3.PREVIEW: yes
smitty update_all- INPUT device / directory for software : [/mnt/iso]
- SOFTWARE to update : _update_all
- PREVIEW only? (install operation will NOT occur) : yes
- COMMIT software updates? : no
- SAVE replaced files? : yes
- ...
- ACCEPT new license agreements? : yes
4.PREVIEW: no
- PREVIEW only? (install operation will NOT occur) : no
Post checks
Check the Technology Level (TL) and Service Pack (SP)
# Check TL
oslevel -r

# Check SP
oslevel -s
Check Fileset Consistency
# Ideally, it returns to the command line with no output.
lppchk -v
Interim Fix (APAR)
URL to check the APAR number
https://www.ibm.com/support/pages/apar/[apar number]
Interim fix installation
# List all interim fixes on the system
emgr -l
emgr -l IJ50602m7a

# Preview & Install an interim fix package
emgr -p -e IJ50602m7a.240409.epkg.Z
emgr -X -e IJ50602m7a.240409.epkg.Z
FAQ
EFIX MANAGER LOCKS
EFIX MANAGER LOCKS
------------------* * * ATTENTION * * *
The following selected filesets are locked by EFIX manager:
bos.rte.control
installp has halted this operation because one or more files in the
filesets listed above are registered as having an EFIX. You must remove
these EFIXES before performing operations on the given fileset.To get a listing of all locked filesets and the locking EFIX label,
execute the following command:# /usr/sbin/emgr -P
To remove the given EFIX, execute the following command:
# /usr/sbin/emgr -r -L <EFIX label>
For more information on EFIX management please see the emgr man page
and documentation.
Solution:
# List the EFIX installed
emgr -l

# List the EFIX locked
emgr -P

# Remove the EFIX locked
emgr -r -L <EFIX label>
Q & A
0516-1398 extendvg
0516-1398 extendvg: The physical volume hdisk1, appears to belong to another volume group. Use the force option to add this physical volume to a volume group.
Solution:
extendvg -f rootvg hdisk1File too large
.//H11072988.iso: File too large
Solution:
Edit: /etc/security/limits
root:
        fsize = -1
Re-login then run the command
ulimit -avmount: Operation not permitted
無法掛載 NFS 目錄
mount: 1831-008 giving up on:
192.168.99.1:/dataVol/aix_nfs
vmount: Operation not permitted.
Solution:
# check nfs_use_reserved_ports if it is on 0 or 1
nfso -a

# Change nfs_use_reserved_ports to 1 until nextboot
nfso -o nfs_use_reserved_ports=1

# Make change to permanent value
nfso -po nfs_use_reserved_ports=1
lppchk: Inconsistent state
執行 lppchk -v 出現以下輸出
lppchk: The following filesets need to be installed or corrected to bringthe system to a consistent state:bos.net.nfs.client 7.2.5.201 (usr: APPLIED, root: not installed)bos.net.nfs.client 7.2.5.203 (usr: APPLIED, root: not installed)
Solution:
installp -Or bos.net.nfs.client
AIX LVM
PV
# Add a disk hdisk3 to a PV
## NOTE: 新 disk 要加入 PV 成功後,執行 lspv 才會有 pv-id
cfgmgr
chdev -l hdisk3 -a pv=yes
lspv

# Remove a PV from a disk hdisk3
## If done, the pv-id appears 'none'
chdev -l hdisk3 -a pv=clear
lspv

# 檢視 PV 使用/剩餘空間
lspv <PV-NAME>

# 檢視 PV 被使用的狀況
lspv -M hdisk0

# 檢視 PV 包含的 LVs
lspv -l hdisk0

# Check the hdisk VendorId/size
lsmpio -q
VG
# Create VG with 128M(PP size)
mkvg -y <vg-name> -s 128 hdisk1 hidisk2

# Add PVs hdisk3, hdisk4 to specific VG
extendvg <vg-name> hdisk3 hdisk4

# Remove a VG with PVs hdisk3, hdisk4
reducevg <vg-name> hdisk3 hdisk4

# List commands
lsvg <VG-NAME>     # Check the VG
lsvg -l <VG-NAME>  # Check the LVs in the VG
lsvg -p <VG-NAME>  # Check the PVs in the VG
LV
# Create LV with 5G
## mklv -y <lv-name> -t jfs2 <vg-name> [LP-number|GB-size]
/usr/sbin/mklv -y'siview_lv' -tjfs2 smapvg 80
/usr/sbin/mklv -y'siview_lv' -tjfs2 smapvg 10G

# Remove a LV
rmlv <lv-name>

# List the PVs for specified LV
lslv -l <LV-NAME>
LV Mirror
# Add a copy of LV hd4 into specified PV hdisk1
## mklvcopy <LV-NAME> <NUMBER-of-COPY(1|2)> <PV-NAME>
mklvcopy hd4 2 hdisk1

syncvg -v rootvg

# Verify the state
## Check STALE PVs: 0, STALE PPs:0
lsvg rootvg

## Check the LV STATE: open/syncd
lsvg -l rootvg

# Remove a copy of LV from specified PV
rmlvcopy hd4 1 hdisk1
Filesystem
# Create a filesystem with /data
## -A: Whether the filesystem is mounted at each system restart.
## crfs -v jfs2 -A yes -d <lv-name> -m <mount-point> -a logname=INLINE
/usr/sbin/crfs -v 'jfs2' -A'yes' -d'siview_lv' -m'/home/siview' -a logname=INLINE
mount /home/siview

# Extend the size of 1024MB for specified filesystem
chfs -a size=+1024M /home
## Alternatively, resizing to specified number
chfs -a size=2048M /home

# Remove a filesystem
## Check if the mount-point has been closed/syncd
lslv -l <vg-name>
rmfs <mount-point>
監控 Errpt
Sample #1
#!/usr/bin/env bash
#
# $0 = errptcheck_v3.sh
#
# Created: 05/16/2005 A-lang Hsu.
# Updated:
#    - v4, 11/19/2015 A-Lang
#    - v5, 11/17/2020 A-Lang
#
#
# This script will check the error log
# for new entries.  Upon finding them, it will send an email to
# administrators containing a message indicating the change
# in errlog status, as well as the offending lines.
#
PATH=/bin:/sbin:/usr/bin:/usr/sbin:/usr/local/bin:/usr/es/sbin/cluster/utilities

tmpfile="errptcheck.$$"
trap "rm -f $tmpfile" EXIT

today="$(date +'%Y-%m-%d')"
nowtime="$(date +'%T')"

# Excluded identifier id
# 573790AA - The default log file has been changed.
# A3B02BE6 - sddsrv CAN'T WRITE ITS LOG FILE
#
#EXCLUDE_ID=" \
#573790AA \
#A3B02BE6 \
#"
EXCLUDE_ID=""

#
if $(which get_local_nodename >/dev/null 2>&1); then
    my_hostname=`hostname`#`get_local_nodename`
else
    my_hostname=`hostname`
fi

mail_subject="Warning:Hardware/Software error notification for host $my_hostname"
mail_to="alang@mycom.com"

#ec=`errpt -dH,S,U,O | grep -v "IDENTIFIER TIMESTAMP" | wc -l`
ERRGREP=""
n=0
for i in $EXCLUDE_ID;do
    n=$(($n+1))
    if [ "$n" -eq 1 ];then
       ERRGREP="$i"
    else
       ERRGREP="$ERRGREP|$i"
    fi
done
if [ -z "$ERRGREP" ]; then
   ec=`errpt -dH,S,U,O | grep -v "IDENTIFIER TIMESTAMP" | wc -l`
else
   ec=`errpt -dH,S,U,O | grep -v "IDENTIFIER TIMESTAMP" | grep -vE "$ERRGREP" | wc -l`
fi

if [ "$ec" -ne "0" ] ; then
        ec=`echo $ec | bc`
        cat <<EOF > $tmpfile
##############################################################
  This message was generated automatically by host ${my_hostname}.
  Please don't reply to this message.
##############################################################

The checked time is ${today} ${nowtime}
${ec} new errors have been found on $my_hostname.
EOF

        errlogl=`errpt -dH,S,U,O -a`
        cat <<EOF >> $tmpfile
Errlog details below:
${errlogl}
EOF
        mail -s "$mail_subject"  "$mail_to" < $tmpfile;

        cat $tmpfile
fi
Sample #2
#! /bin/ksh
#
# $0 = errmon.sh
#
# Written 11/3/1998 Bill Verzal.
#
# This script will run every [interval] and check the error log
# for new entries.  Upon finding them, it will send an email to
# administrators containing a message indicating the change
# in errlog status, as well as the offending lines.
#
if [ "$1" = "-v" ] ; then
   set -x
fi
lc="NULL"
tc="$lc"
# lc="last count"
# tc="this count"
#interval=900
interval=300
# Divide interval by 60 to get number of minutes.
me="$0 - Hardware error monitoring"
myname=`hostname`
args="$*"
#mailto="root"
mailto="alert"
true=0
false=1
boj=`date`

echo "$me started.\nThis message goes to $mailto." | mail -s "Errlog monitoring for $myname" $mailto
logger "$0 started"

while [ "$true" != "$false" ] ; do
    tc=`errpt -dH,S,U,O | wc -l`
    if [ "$lc" = "NULL" ] ; then
        lc="$tc"
    fi
    if [ "$lc" -ne "$tc" ] ; then
        foo=`echo "$tc-$lc"|bc`
        msg="$foo new errors have been found on $myname"
        page_msg="$foo new errors have been found on $myname"
        errlogl=`errpt -dH,S,U,O -a`
        if [ "$tc" -eq "0" ] ; then
            msg="$msg\n Errlog was cleared"
        else
            logger $msg
            msg=" $msg \n Errlog details below:\n $errlogl \n"
            echo "$msg" | mail -s "Errlog status change on host $myname" $mailto
        fi
    fi
    lc="$tc"
    sleep $interval
done
AIX Monitoring
Reference
AIX Toolbox
Tutorials
- Configuring YUM and creating local repositories on IBM AIX - IBM Developer
- Tips for Installing Python or other AIX Toolbox for Open Source Software
- Get Started with the AIX Toolbox for Open Source Software
- Creating local repo with DNF and AIX Toolbox Media Image
下載
RPM
- AIX Toolbox for Open Source Software : Downloads alpha (ibm.com) (NOTE: 如果發生 500 錯誤,請 Refresh 頁面)
- Index of /aix/freeSoftware/aixtoolbox
ISO/Tar File
https://support.ibm.com (NOTE: 需要有軟體維護合約(SWMA)的帳號)
- -> Downloads
- -> Entitled Systems Support (ESS)
- -> Login
- -> My Entitled Software
- -> Software Downloads
- -> AIXV7R3
- -> Search Glass
- -> AIX Enterprise Edition 7.2 and 7.3
- -> 2259: AIX Toolbox for Linux APPS v06.01.00,ENU,DVD
- -> I Agree
- -> HTTPS method
- -> ESD-Toolbox_for_Linux_Apps_Common_7.1-7.3_112023_LCD4107738.iso
常用技巧
檢視 非AIX Toolbox 的套件
為了維護套件的相依性與可更新,不要安裝非 AIX Toolbox 包含的其他套件。
執行以下指令,如果輸出 Build Host 不是包含 *.ibm.com 位址的套件,應該考慮將它移除。
Tip: 如果是 AIX-rpm 套件,這是 AIX ISO 預設安裝的,可以忽略它。
rpm -qai | egrep "Name|Install Date|Build Date|Build Host"Local DNF repository
建立 AIX Toolbox 本地套件庫
步驟:
- 從官網下載最新的 AIX Toolbox ISO 或 TGZ 檔
- 在 AIX 系統掛載 ISO 檔或解開 TGZ 檔,目的路徑:
/mnt/aixtoolbox - 建立本地庫,執行腳本
/mnt/aixtoolbox/ezinstall/ppc/dnf_aixtoolbox_local.sh - 檢查設定檔:
/opt/freeware/etc/dnf/dnf.conf - 執行套件更新
Mount the ISO file
loopmount -i aix_linux_toolbox_*.iso -o "-V udfs -o ro" -m /mnt/isoCreate local repo.
- Usage:
dnf_aixtoolbox_local.sh <mount path or tar extraction path>
/mnt/iso/ezinstall/ppc/dnf_aixtoolbox_local.sh /mnt/iso自動產生設定檔 /opt/freeware/etc/dnf/dnf.conf :
[main]
cachedir=/var/cache/dnf
keepcache=1
debuglevel=2
logfile=/var/log/dnf.log
exactarch=1
gpgcheck=1
installonly_limit=3
clean_requirements_on_remove=True
best=True

plugins=1

[Local_AIX_Toolbox]
name=Local AIX generic repository
baseurl=file:///mnt/iso/RPMS/ppc/
enabled=1
gpgcheck=0

[Local_AIX_Toolbox_noarch]
name=Local AIX noarch repository
baseurl=file:///mnt/iso/RPMS/noarch/
enabled=1
gpgcheck=0

[Local_AIX_Toolbox_72]
name=Local AIX 7.2 specific repository
baseurl=file:///mnt/iso/RPMS/ppc-7.2/
enabled=1
gpgcheck=0
套件更新
root@aixvm:worktmp> dnf repolist
repo id                                      repo name
Local_AIX_Toolbox                            Local AIX generic repository
Local_AIX_Toolbox_72                         Local AIX 7.2 specific repository
Local_AIX_Toolbox_noarch                     Local AIX noarch repository


root@aixvm:worktmp> dnf check-update
Local AIX generic repository                                       1.6 MB/s | 1.4 MB     00:00
Local AIX noarch repository                                        1.7 MB/s | 595 kB     00:00
Local AIX 7.2 specific repository                                  1.1 MB/s | 146 kB     00:00
Last metadata expiration check: 0:00:01 ago on Wed Mar  5 15:19:23 CST 2025.

ca-certificates.ppc                         2024.2.66-1                        Local_AIX_Toolbox
dnf.ppc                                     4.2.17-32_51                       Local_AIX_Toolbox_72
dnf-automatic.ppc                           4.2.17-32_51                       Local_AIX_Toolbox_72
dnf-data.ppc                                4.2.17-32_51                       Local_AIX_Toolbox_72
expect.ppc                                  5.45.4-2                           Local_AIX_Toolbox
libcomps.ppc                                0.1.15-101                         Local_AIX_Toolbox
libdnf.ppc                                  0.39.1-32_52                       Local_AIX_Toolbox_72
libmodulemd.ppc                             1.5.2-100                          Local_AIX_Toolbox
librepo.ppc                                 1.11.0-103                         Local_AIX_Toolbox
...
...

root@aixvm:worktmp> dnf update
Ksh
Korn shell - ksh
if-then
if [[ -e /usr/opt/rpm/bin/rpm ]]
then
    RPM_CMD="/usr/opt/rpm/bin/rpm"
else
    RPM_CMD="/usr/bin/rpm"
fi

# Check if we are running this as the root user.
if [[ "$(/usr/bin/id -u)" != "0" ]]
then
    echo "This script must be run as root."
    exit 1
fi
Check AIX Version
# First check the AIX version.
oslvl=`/usr/bin/oslevel`
aix_ver=$(/usr/bin/lslpp -qLc bos.rte | /usr/bin/awk -F':' '{print $3}')
af1=$(echo $aix_ver | /usr/bin/cut -d"." -f1)
af2=$(echo $aix_ver | /usr/bin/cut -d"." -f2)
af3=$(echo $aix_ver | /usr/bin/cut -d"." -f3)
if [[ "$oslvl" = "7.1.0.0" ]]
then
    if [[ ( ! $af1 -ge 7 ) || ( ! $af2 -ge 1 ) || ( ! $af3 -ge 3 ) ]]
    then
        echo "dnf and dependencies can be installed on AIX 7.1.3 and higher versions."
        exit 1
    fi
else
    if [[ ( ! $af1 -ge 7 ) || ( ! $af2 -ge 1 ) ]]
    then
         echo "dnf and dependencies can be installed on AIX 7.1.3 and higher versions."
         exit 1
     fi
fi
Help
prog=${0##*/}
usage() {
    print >&2 "Usage: $prog <-d> <-y> <-n> -?

      -d    Install and setup dnf if yum is not installed.
            yum command will not be available only dnf command can be used.
      -y    Installs dnf, and updates yum3 to dnf yum4 if yum3 is installed.
            If no yum3 is installed then dnf and yum4 will be installed.
            yum command will also be available along with dnf.
      -n    Install dnf where both yum and dnf can coexist if yum is installed already.
            This is not a recommended option."
    exit 1
}

if [[ $# -ne 1 ]]
then
    usage
    exit 1
fi
Check disk space for /tmp
oslvl=`/usr/bin/oslevel`
aix_730_plus=0
os_f1=$(echo $oslvl | /usr/bin/cut -d"." -f1)
os_f2=$(echo $oslvl | /usr/bin/cut -d"." -f2)
os_f3=$(echo $oslvl | /usr/bin/cut -d"." -f3)
os_f4=$(echo $oslvl | /usr/bin/cut -d"." -f4)
if [[ ( $os_f1 -ge 7 ) && ( $os_f2 -ge 3 ) && ( $os_f3 -ge 0 ) && ( $os_f4 -ge 0 ) ]]
then
    aix_730_plus=1
fi

aix_715_prior=0
oslvl_tl=`/usr/bin/lslpp -qLc bos.rte | /usr/bin/cut -d: -f3`
os_f1=$(echo $oslvl_tl | /usr/bin/cut -d"." -f1)
os_f2=$(echo $oslvl_tl | /usr/bin/cut -d"." -f2)
os_f3=$(echo $oslvl_tl | /usr/bin/cut -d"." -f3)
if [[ ( $os_f1 -eq 7 ) && ( $os_f2 -eq 1 ) && ( $os_f3 -lt 5 ) ]]
then
    aix_715_prior=1
fi

# Check if /tmp has enough space to download rpm.rte & dnf_bundle
# and size for extracting rpm packages.

if [[ $aix_730_plus -eq 1 ]]
then
    typeset -i total_req=`echo "(512)" | bc`
    tmp_free=`/usr/bin/df -m /tmp | /usr/bin/sed -e /Filesystem/d | /usr/bin/awk '{print $3}'`
    if [[ $tmp_free -le $total_req ]]
    then
        echo "Please make sure /tmp has around 512MB of free space to download and"
        echo "extract files from dnf_bundle."
        exit 1
    fi
else
    typeset -i total_req=`echo "(512)" | bc`
    tmp_free=`/usr/bin/df -m /tmp | /usr/bin/sed -e /Filesystem/d | /usr/bin/awk '{print $3}'`
    if [[ $tmp_free -le $total_req ]]
    then
        echo "Please make sure /tmp has around 512MB of free space to download and"
        echo "extract files from dnf_bundle."
        exit 1
    fi
fi
Download with ftp and perl
if [[ $aix_715_prior -eq 1 ]]
then
    echo "Attempting download of dnf_bundle_aix_71_72.tar ..."
    username="anonymous"
    userpassword="anonymous"

    /usr/bin/expect <<DNFEOF
        log_user 0
        set timeout -1
        spawn ftp -s public.dhe.ibm.com
        expect "Name (public.dhe.ibm.com:*): "
        send "$username\r"
        expect "Password:"
        send "$userpassword\r"
        expect "ftp>"
        send "lcd $tmppath\r"
        expect "ftp>"
        send "bin\r"
        expect "ftp>"
        send "passive\r"
        expect "ftp>"
        send "cd aix/freeSoftware/aixtoolbox/ezinstall/ppc\r"
        expect "ftp>"
        send "get dnf_bundle_aix_71_72.tar\r"
        expect "ftp>"
        send "bye\r"
        expect eof
DNFEOF
   if [[ ! -e  dnf_bundle_aix_71_72.tar ]]
   then
       echo "Failed to download dnf_bundle_aix_71_72.tar."
       cd - >/dev/null 2>&1
       rm -rf $tmppath
       exit 1
   fi
elif [[ $aix_730_plus -eq 1 ]]
then
    echo "Attempting download of dnf_bundle_aix_73.tar ..."
    export PERL_LWP_SSL_VERIFY_HOSTNAME=0
    LDR_CNTRL=MAXDATA=0x80000000@DSA /usr/opt/perl5/bin/lwp-download https://public.dhe.ibm.com/aix/freeSoftware/aixtoolbox/ezinstall/ppc/dnf_bundle_aix_73.tar
    if [[ $? -ne 0 ]]
    then
        echo "Failed to download dnf_bundle_aix_73.tar"
        cd - >/dev/null 2>&1
        rm -rf $tmppath
        exit 1
    fi

    # Do this once rpm.rte for 730 is available on AIX Toolbox.
    #/usr/opt/perl5/bin/lwp-download http://public.dhe.ibm.com/aix/freeSoftware/aixtoolbox/INSTALLP/ppc/rpm.rte
    #if [[ $? -ne 0 ]]
    #then
    #    echo "Failed to download rpm.rte"
    #    exit 1
    #fi
else
    echo "Attempting download of dnf_bundle_aix_71_72.tar ..."
    LDR_CNTRL=MAXDATA=0x80000000@DSA /usr/opt/perl5/bin/lwp-download https://public.dhe.ibm.com/aix/freeSoftware/aixtoolbox/ezinstall/ppc/dnf_bundle_aix_71_72.tar
     if [[ $? -ne 0 ]]
     then
        echo "Failed to download dnf_bundle_aix_71_72.tar"
        cd - >/dev/null 2>&1
        rm -rf $tmppath
        exit 1
     fi
    #/usr/opt/perl5/bin/lwp-download http://public.dhe.ibm.com/aix/freeSoftware/aixtoolbox/INSTALLP/ppc/rpm.rte
    # if [[ $? -ne 0 ]]
    # then
    #    echo "Failed to download  rpm.rte"
    #    exit 1
    # elif [[ -e rpm.rte.txt ]]
    # then
    #     /usr/bin/mv rpm.rte.txt rpm.rte
    # fi
fi
#end of perl download
Check if running as root
# Check if we are running this as the root user.
if [[ "$(/usr/bin/id -u)" != "0" ]]
then
    echo "This script must be run as root."
    exit 1
fi
AIX Simple Firewall
Prerequisities
Packages to be installed
- bos.msg.en_US.net.ipsec
- bos.net.ipsec.keymgt
- bos.net.ipsec.rte
- clic.rte.kernext
- clic.rte.lib
CLI
lslpp -l bos.msg.en_US.net.ipsec

  Fileset                      Level  State      Description
  ----------------------------------------------------------------------------
Path: /usr/lib/objrepos
  bos.msg.en_US.net.ipsec    7.2.5.0  COMMITTED  IP Security Messages - U.S.
                                                 English
Start/Stop IP Security
CLI
# Start command for ipsec_v4
/usr/sbin/mkdev -c ipsec -t 4
/usr/sbin/mkfilt -v 4 -u -z P

# Stop command
/usr/sbin/rmdev -l ipsec_v4
Smitty
smitty ipsec4 > Start/Stop IP Security > Start IP Security
- Start IP Security: [Now and After Reboot]
- Deny All Non_Secure IP Packets: [no]
Verify command
> lsdev -C | grep ipsec
ipsec_v4    Available       IP Version 4 Security Extension
ipsec_v6    Available       IP Version 6 Security Extension

> lsdev -l ipsec_v4
ipsec_v4 Available  IP Version 4 Security Extension
日誌檔設置
cp /etc/syslog.conf /etc/syslog.conf.bak
echo "local4.debug /var/log/ipsec.log" >> /etc/syslog.conf
touch /var/log/ipsec.log
chmod 0644 /var/log/ipsec.log
refresh -s syslogd
啟用/停用封包紀錄
- 啟用封包紀錄功能,要注意日誌檔的成長幅度,建議使用獨立的 filesystem,避免影響重要服務。
- 規則(Rule)需要同時啟用 Logging control 參數。
# Start the packet logging
mkfilt -v4 -g start

# Stop the packet logging
mkfilt -v4 -g stop
Filter Rules
常用指令
- genfilt : 新增規則
- rmfilt : 刪除規則
rmfilt -v 4 -n 3: 移除規則 3
- chfilt : 變更規則
chfilt -v 4 -n 3 -s xxx.xxx.xxx.xxx: 變更規則3 的來源 IP
- 啟用所有規則 :
mkfilt -v 4 -u - 停用所有規則 :
mkfilt -v 4 -d - 列出所有規則 :
lsfilt -v 4 -O
規則參數
-v 4: IPv4 網路-a: Action,P (Permit), D (Deny)-n: 規則編號-s: 來源 IP 或網段,例如 192.168.99.1 或 192.168.99.0-m: 來源遮罩,個別 IP 填 255.255.255.255;C 網段 IP 填 255.255.255.0-d: 目的 IP 或網段,例如 192.168.99.1 或 192.168.99.0-M: 目的遮罩,個別 IP 填 255.255.255.255;C 網段 IP 填 255.255.255.0-g: source routing, 例如 N, Y(default)-c: Protocol, 例如 tcp, udp, all-O eq -P 21: Port 21 (FTP)-O any -P 0: 任意 Port (所有服務)-O neq -P 22: 除 SSH 服務以外-w: Direction, 例如 I (inbound), O (outbound) 或 B (both)-l: 是否開啟稽核日誌,例如 Y, N(default) (須配合封包紀錄啟動)-i: 網卡介面,例如 all, en0-D: Description, 其他補充說明
白名單模式 by ip/port
Inbound Rule : 針對 FTP (port 21) 限制指定來源 IP (my-linux-ip) 或網段。
genfilt -v 4 -a P -s <my-linux-ip> -m 255.255.255.255 -d <aix-server-IP> -M 255.255.255.255 -g Y -c tcp -o any -p 0 -O eq -P 21 -r B -w I -l Y -f Y -i all

genfilt -v 4 -a D -s 0.0.0.0 -m 0.0.0.0 -d <aix-server-IP> -M 255.255.255.255 -g Y -c tcp -o any -p 0 -O eq -P 21 -r B -w I -l N -f Y -i all- Rule 0,1,2 是內建預設規則
- TIPs
- 規則異動後,必須重啟規則才能生效。
- 白名單模式:先 Permit 特定來源,再 Deny 所有來源
root@aixvm:> lsfilt -v4 -O

1|permit|0.0.0.0|0.0.0.0|0.0.0.0|0.0.0.0|no|udp|eq|4001|eq|4001|both|both|no|all packets|0|all|0|||Default Rule
2|*** Dynamic filter placement rule for IKE tunnels ***|no
3|permit|192.168.99.1|255.255.255.255|192.168.99.100|255.255.255.255|yes|tcp|any|0|eq|21|both|inbound|yes|all packets|0|all|0|||
4|deny|0.0.0.0|0.0.0.0|192.168.99.100|255.255.255.255|yes|tcp|any|0|eq|21|both|inbound|no|all packets|0|all|0|||
0|permit|0.0.0.0|0.0.0.0|0.0.0.0|0.0.0.0|yes|all|any|0|any|0|both|both|no|all packets|0|all|0|||Default Rule

root@aixvm:> lsfilt -v4
Beginning of IPv4 filter rules.
Rule 1:
Rule action         : permit
Source Address      : 0.0.0.0
Source Mask         : 0.0.0.0
Destination Address : 0.0.0.0
Destination Mask    : 0.0.0.0
Source Routing      : no
Protocol            : udp
Source Port         : eq  4001
Destination Port    : eq  4001
Scope               : both
Direction           : both
Logging control     : no
Fragment control    : all packets
Tunnel ID number    : 0
Interface           : all
Auto-Generated      : yes
Expiration Time     : 0
Description         : Default Rule

Rule 2:
*** Dynamic filter placement rule for IKE tunnels ***
Logging control     : no

Rule 3:
Rule action         : permit
Source Address      : 192.168.99.1
Source Mask         : 255.255.255.255
Destination Address : 192.168.99.100
Destination Mask    : 255.255.255.255
Source Routing      : yes
Protocol            : tcp
Source Port         : any 0
Destination Port    : eq  21
Scope               : both
Direction           : inbound
Logging control     : yes
Fragment control    : all packets
Tunnel ID number    : 0
Interface           : all
Auto-Generated      : no
Expiration Time     : 0
Description         :

Rule 4:
Rule action         : deny
Source Address      : 0.0.0.0
Source Mask         : 0.0.0.0
Destination Address : 192.168.99.100
Destination Mask    : 255.255.255.255
Source Routing      : yes
Protocol            : tcp
Source Port         : any 0
Destination Port    : eq  21
Scope               : both
Direction           : inbound
Logging control     : no
Fragment control    : all packets
Tunnel ID number    : 0
Interface           : all
Auto-Generated      : no
Expiration Time     : 0
Description         :

Rule 0:
Rule action         : permit
Source Address      : 0.0.0.0
Source Mask         : 0.0.0.0
Destination Address : 0.0.0.0
Destination Mask    : 0.0.0.0
Source Routing      : yes
Protocol            : all
Source Port         : any 0
Destination Port    : any 0
Scope               : both
Direction           : both
Logging control     : no
Fragment control    : all packets
Tunnel ID number    : 0
Interface           : all
Auto-Generated      : no
Expiration Time     : 0
Description         : Default Rule

End of IPv4 filter rules.
白名單模式 by ip
Inbound Rule : 限制指定來源 IP (my-linux-ip) 或網段存取所有服務。
# Allow from 192.168.99.1
genfilt -v 4 -a P -s 192.168.99.1 -m 255.255.255.255 -d 192.168.99.100 -M 255.255.255.255 -g N -c tcp -o any -p 0 -O any -P 0 -r B -w I -l Y -f Y -i all

# Deny from all
genfilt -v 4 -a D -s 0.0.0.0 -m 0.0.0.0 -d 192.168.99.100 -M 255.255.255.255 -g N -c tcp -o any -p 0 -O any -P 0 -r B -w I -l N -f Y -i all -D "Deny from All"
Optional: 排除 SSH 以外的所有服務,第二行指令改成
# Deny non-SSH services from All
genfilt -v 4 -a D -s 0.0.0.0 -m 0.0.0.0 -d 192.168.99.100 -M 255.255.255.255 -g N -c tcp -o any -p 0 -O neq -P 22 -r B -w I -l N -f Y -i all -D "Deny non-SSH Services from All"
調整順序
編號 3 與 4 順序互換
...
3|deny|0.0.0.0|0.0.0.0|192.168.99.100|255.255.255.255|yes|tcp|any|0|eq|21|both|inbound|no|all packets|0|all|0|||
4|permit|192.168.99.1|255.255.255.255|192.168.99.100|255.255.255.255|yes|tcp|any|0|eq|21|both|inbound|yes|all packets|0|all|0|||
...
步驟:
- 刪除第 4 條:
rmfilt -v4 -n 3 - 重建一樣的規則,並指定編號為 3:
genfilt -v 4 -n 3 -a P -s 192.168.99.1 -m 255.255.255.255 -d 192.168.99.100 -M 255.255.255.255 -g Y -c tcp -o any -p 0 -O eq -P 21 -r B -w I -l Y -f Y -i all
清除規則
清除所有自定義的規則,除了預設的以外
rmfilt -v4 -n all匯入/匯出規則
匯出
- 指令:
expfilt -r -f . -f .: 輸出至目前目錄,檔名固定為 ipsec_fltr_rule.exp-r: 一定要加這參數,否則規則的 Direction 會被變更
root@aixvm:ipsec_filters> lsfilt -v4 -O

1|permit|0.0.0.0|0.0.0.0|0.0.0.0|0.0.0.0|no|udp|eq|4001|eq|4001|both|both|no|all packets|0|all|0|||Default Rule
2|*** Dynamic filter placement rule for IKE tunnels ***|no
3|permit|192.168.99.8|255.255.255.255|192.168.99.100|255.255.255.255|yes|tcp|any|0|eq|21|both|inbound|yes|all packets|0|all|0|||
4|deny|0.0.0.0|0.0.0.0|192.168.99.100|255.255.255.255|yes|tcp|any|0|eq|21|both|inbound|no|all packets|0|all|0|||
0|permit|0.0.0.0|0.0.0.0|0.0.0.0|0.0.0.0|yes|all|any|0|any|0|both|both|no|all packets|0|all|0|||Default Rule

root@aixvm:ipsec_filters> expfilt -r -f .

Filter rule 3 for IPv4 has been exported successfully.
Filter rule 4 for IPv4 has been exported successfully.
Filter rule(s) have been exported to ipsec_fltr_rule.exp successfully.

root@aixvm:ipsec_filters> ls -l
total 16
-rw-r--r--    1 root     system          417 Jun 03 15:37 ipsec_fltr_rule.exp
匯入
- 指令:
impfilt -f .從目前目錄匯入
root@aixvm:ipsec_filters> ls -l
total 16
-rw-r--r--    1 root     system          417 Jun 03 15:37 ipsec_fltr_rule.exp

root@aixvm:ipsec_filters> lsfilt -v4 -O
1|permit|0.0.0.0|0.0.0.0|0.0.0.0|0.0.0.0|no|udp|eq|4001|eq|4001|both|both|no|all packets|0|all|0|||Default Rule
2|*** Dynamic filter placement rule for IKE tunnels ***|no
3|permit|192.168.99.8|255.255.255.255|192.168.99.100|255.255.255.255|yes|tcp|any|0|eq|21|both|inbound|yes|all packets|0|all|0|||
4|deny|0.0.0.0|0.0.0.0|192.168.99.100|255.255.255.255|yes|tcp|any|0|eq|21|both|inbound|no|all packets|0|all|0|||
0|permit|0.0.0.0|0.0.0.0|0.0.0.0|0.0.0.0|yes|all|any|0|any|0|both|both|no|all packets|0|all|0|||Default Rule

root@aixvm:ipsec_filters> rmfilt -v4 -n all
Filter rule 3 for IPv4 has been removed successfully.
Filter rule 4 for IPv4 has been removed successfully.

root@aixvm:ipsec_filters> impfilt -f .
Filter rule 3 for IPv4 imported as rule 3.
Filter rule 4 for IPv4 imported as rule 4.
Filter rule(s) have been imported successfully.

root@aixvm:ipsec_filters> lsfilt -v4 -O
1|permit|0.0.0.0|0.0.0.0|0.0.0.0|0.0.0.0|no|udp|eq|4001|eq|4001|both|both|no|all packets|0|all|0|||Default Rule
2|*** Dynamic filter placement rule for IKE tunnels ***|no
3|permit|192.168.99.8|255.255.255.255|192.168.99.100|255.255.255.255|yes|tcp|any|0|eq|21|both|inbound|yes|all packets|0|all|0|||
4|deny|0.0.0.0|0.0.0.0|192.168.99.100|255.255.255.255|yes|tcp|any|0|eq|21|both|inbound|no|all packets|0|all|0|||
0|permit|0.0.0.0|0.0.0.0|0.0.0.0|0.0.0.0|yes|all|any|0|any|0|both|both|no|all packets|0|all|0|||Default Rule
黑名單模式
Rule:
- action: deny
- source: 192.168.99.1
- destination: any
- protocol: all
- direction: inbound
genfilt -v 4 -a D -s 192.168.99.1 -m 255.255.255.255 -d 0.0.0.0 -M 0.0.0.0 -g Y -c all -r B -w I -l Y -f Y -i allScripts
Usage: Add new IP of whitelist
- Edit file: aixfw-config.sh
- Clean out all rules:
./aixfw-cmd.sh cleanall - Config new rules:
./aixfw-config.sh - Preview the list of rules:
./aixfw-cmd.sh show - Restart the firewall:
./aixfw-cmd.sh restart
aixfw-cmd.sh
#!/usr/bin/env bash
# AIX built-in firewall commands
# Author: A-Lang
# Created: 2025/7/11


Usage() {
    echo
    echo "Usage: `basename $0` [start|stop|restart|show|cleanall]"
    echo "e.g  : `basename $0` show"
    echo "Options:"
    echo "  [start]   - Start Firewall"
    echo "  [stop]    - Stop Firewall"
    echo "  [restart] - Restart/Reload Firewall"
    echo "  [show]    - List All Rules of Firewall"
    echo "  [cleanall] - Clean out All custom rules of Firewall"
}

ToUpper() {
    echo $1 | tr "[:lower:]" "[:upper:]"
}

fw_start() {
    mkfilt -v4 -u
}

fw_stop() {
    mkfilt -v4 -d
}

fw_cleanall() {
    rmfilt -v4 -n all
}

fw_show() {
    lsfilt -v4 -O
}

################ Main Codes ################
if [ $# -ne 1 ];
then
    Usage
    exit 1
fi

cmd="$(ToUpper $1)"
case $cmd in
    "START") fw_start;;
    "STOP")  fw_stop;;
    "RESTART") fw_stop; fw_start;;
    "SHOW")  fw_show;;
    "CLEANALL") fw_cleanall;;
    *) Usage; exit;;
esac

#echo "Done!"
aixfw-config.sh
#!/usr/bin/env bash
# Purpose: Setting up AIX built-in firewall as Whitelist mode
# Author: A-Lang
# Created: 2025/7/14

serverip="10.22.210.99"

while true; do
echo "The Server IP is $serverip"
read -p "Are you sure that you want to continue? (y/N): " input
input=${input:-n}
    case "$input" in
        y|Y)
            echo
            break
            ;;
        n|N)
            echo "Exit"
            exit 1
            ;;
        *) echo "Please answer Y or N.";;
    esac
done

## Add the allowed IPs below
# For AIX VM only
#genfilt -v 4 -a P -s 192.168.99.1 -m 255.255.255.255 -d $serverip -M 255.255.255.255 -g N -c tcp -o any -p 0 -O any -P 0 -r B -w I -l Y -f Y -i all -D "For AIX VM only"

# Servers-B
# NOTE: Please replace xxx.xxx.xxx.xxx with the source IP that is allowed to access the server.
#genfilt -v 4 -a P -s xxx.xxx.xxx.xxx -m 255.255.255.255 -d $serverip -M 255.255.255.255 -g N -c tcp -o any -p 0 -O any -P 0 -r B -w I -l Y -f Y -i all -D "Additional Information"

genfilt -v 4 -a P -s 10.14.225.48    -m 255.255.255.255 -d $serverip -M 255.255.255.255 -g N -c tcp -o any -p 0 -O any -P 0 -r B -w I -l Y -f Y -i all -D "DEV01"
genfilt -v 4 -a P -s 10.14.226.31    -m 255.255.255.255 -d $serverip -M 255.255.255.255 -g N -c tcp -o any -p 0 -O any -P 0 -r B -w I -l Y -f Y -i all -D "DEV02"

## Add the allowed IP above

# Deny from all
genfilt -v 4 -a D -s 0.0.0.0 -m 0.0.0.0 -d $serverip -M 255.255.255.255 -g N -c tcp -o any -p 0 -O any -P 0 -r B -w I -l N -f Y -i all -D "Deny from All"