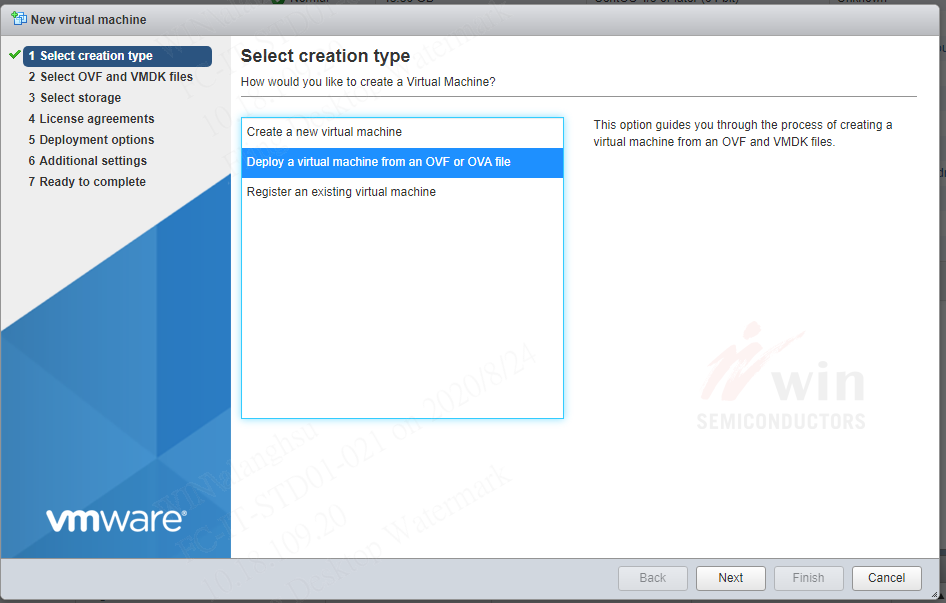
#### Import to vSphere 6 Server
1. 下載 VMware-ovftool: [https://www.dropbox.com/s/k925gfb2zn4ffgw/ovftool.zip?dl=0](https://www.dropbox.com/s/k925gfb2zn4ffgw/ovftool.zip?dl=0)
2. 將 `*.ova` 轉換成 OVF 格式(輸出檔案包含有 `*.ovf`, `*.mf`, `*.vmdk`)
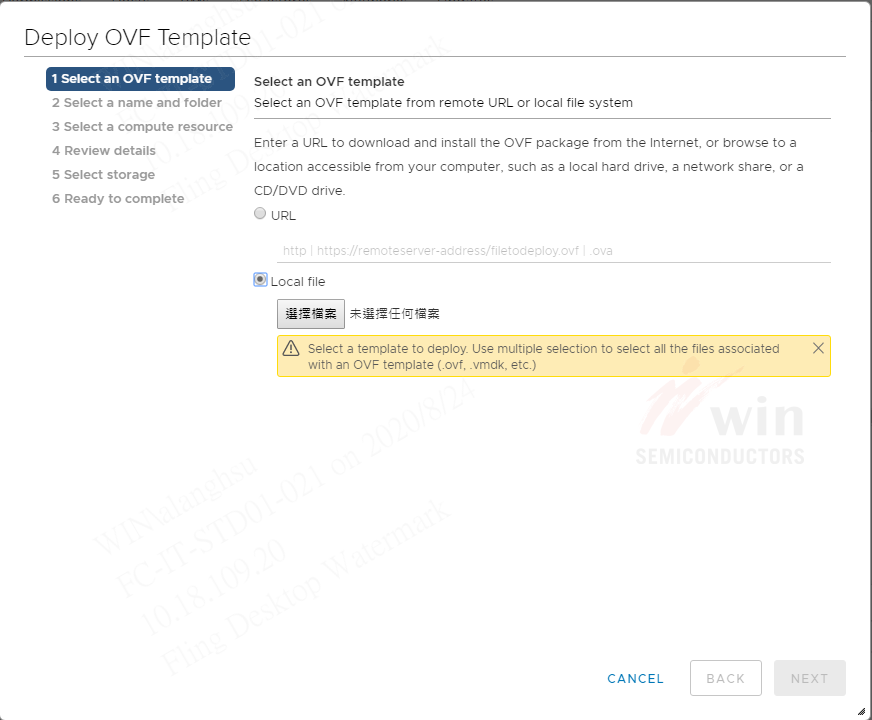
3. 從 vSphere Web 選擇 Deploy OVF Template,來源必須**同時選擇**兩個檔案 `*.ovf` 與 `*.vmdk`
4. 使用 vCenter 介面無法完成匯入,必須改用 ESXi 介面。
OVFTool 轉換
```part
"C:\Program Files\VMware\VMware OVF Tool\ovftool.exe" --lax source.ova target.ovf
```
Deploy OVF template
vSphere ESXi Web)
[](http://www.osslab.tw/uploads/images/gallery/2020-08/deploy_ovf-esxi.png)
vCenter Web)
[](http://www.osslab.tw/uploads/images/gallery/2020-08/deploy_ovf-vcenter.png)
#### F.A.Q
##### Error: No supported hardware versions
> Issues detected with selected template. Details: - -1 : -1:VALUE\_ILLEGAL: No supported hardware versions among \[virtualbox-2.2\]; supported: \[vmx-04, vmx-07, vmx-08, vmx-09, vmx-10, vmx-11, vmx-12, vmx-13\].解決:編輯 `*.ovf`,找到這一段
```part
Virtual Hardware Family0graylog#95virtualbox-2.2
```
搜尋 `VirtualSystemType` 將 `virtualbox-2.2` 改成 `vmx-07`,存檔後,再匯入一次。
##### Error: No space left for device ‘7’ on parent controller ‘5’.
> Line 85: No space left for device ‘7’ on parent controller ‘5’.
> Line 66: Unsupported virtual hardware device ‘AHCI’.Solution: 更換更高版本的 vmx-?? 試試。Error: The checksum(s) from the provided manifest file do not match
> The checksum(s) from the provided manifest file do not match the content of file(s): zabbix5.ovf.Solution: 如果修改過 \*.ovf ,在匯入時不要選擇 \*.mf。
##### Error: Value ‘‘PIIX4’’ of ResourceSubType element not found in \[#\]
> 48:7:VALUE\_ILLEGAL: Value ‘‘PIIX4’’ of ResourceSubType element not found in \[\].
> 57:7:VALUE\_ILLEGAL: Value ‘‘PIIX4’’ of ResourceSubType element not found in \[\].
> 85:7:VALUE\_ILLEGAL: Value ‘‘5’’ of Parent element does not refer to a ref of type DiskControllerReference.
> 75:7:VALUE\_ILLEGAL: Value ‘‘4’’ of Parent element does not refer to a ref of type DiskControllerReference.Solution: 不要使用 vCenter 做匯入;改用 ESX Host 的 Web 管理介面。
#### vmx 版本對應表
ESX version
vmx-07
ESX 4.0
vmx-10
ESX 5.5
vmx-13
ESX 6.5
#### Reference
- [Deploy a Virtual Machine from an OVF or OVA File in the VMware Host Client](https://docs.vmware.com/en/VMware-vSphere/6.5/com.vmware.vsphere.html.hostclient.doc/GUID-8ABDB2E1-DDBF-40E3-8ED6-DC857783E3E3.html)
- [Migrate virtual machine from Oracle VirtualBox to Esxi 5.5](https://felixcentmerino.wordpress.com/virtualization/migrate-virtual-machine-from-oracle-virtualbox-to-esxi-5-5/)
- [把 VM 從 VirtualBox 搬到 VMware ESXi](https://medium.com/@jackyu/%E6%8A%8A-vm-%E5%BE%9E-virtualbox-%E6%90%AC%E5%88%B0-vmware-esxi-f7927817d239)
# ESXi Bug Fix & Upgrade
升級或更新 ESX 主機步驟
#### 用 SSH 方式
以 SSH Client 登入 vSphere 主機進行軟體修正程序。
> NOTE: vSphere 主機必須事先**手動**啟用 SSH 服務。
##### 上傳更新/升級檔至主機
從官網下載的更新/升級檔 `esxi6.5uX-mgmt-bundle-3.4.5-8.zip` 上傳到 vSphere 主機的任一個 datastore。
- 更新檔:修正 Bug,檔名 \*-bundle-\*.zip
- 升級檔:ESXi 版本升級,檔名 \*-depot.zip
> NOTE:
> \- 不同的 vSphere 版本會有相對應的特定更新/升級檔,必須下載正確的版本。
> \- zip 檔案**不需要**解壓縮。
> \- 升級 ESX 軟體時,不能使用 \*.iso 安裝檔
##### 檢查系統版本資訊
vSphere 軟體版本
```
[root@tpeitpesx-a02:~] esxcli system version get
Product: VMware ESXi
Version: 6.5.0
Build: Releasebuild-10719125
Update: 2
Patch: 67
```
vSphere 安裝紀錄
```
[root@tpeitpesx-a02:~] esxcli software profile get
(Updated) HPE-ESXi-6.5.0-Update1-iso-650.U1.10.1.3.3
Name: (Updated) HPE-ESXi-6.5.0-Update1-iso-650.U1.10.1.3.3
Vendor: Hewlett Packard Enterprise
Creation Time: 2019-06-14T03:16:25
Modification Time: 2019-06-14T03:16:35
Stateless Ready: True
Description:
2019-06-14T03:16:25.647136+00:00: The following VIBs are
installed:
ilo 650.10.3.0.2-1OEM.650.0.0.4240417
nmlx4-rdma 3.16.11.6-1OEM.650.0.0.4598673
scsi-iscsi-linux-92 1.0.0.2-3vmw.650.0.0.4564106
sata-sata-sil 2.3-4vmw.650.0.0.4564106
shim-libata-9-2-2-0 6.5.0-0.0.4564106
...
...
----------
HPE Custom Image Profile for ESXi 6.5.0 ISO
VIBs: amsd 650.11.4.0-18.4240417, ata-libata-92 3.00.9.2-16vmw.650.0.0.4564106, ...
```
> TIP:
> \- 列出最開始 ISO 的安裝與之後做過的所有更新記錄。
> \- 如有執行升級,這裡 profile 的版本資訊並不會更新。
##### 檢查更新/升級檔的資訊
上傳目錄: `/vmfs/volumes/{your-datastore-name}/{path-to-the-file}`
```
[root@tpeitpesx-a02:~] esxcli software sources vib list -d /vmfs/volumes/LocalDisk/Patches/esxi6.5uX-mgmt-bundle-3.4.
5-8.zip
Name Version Vendor Creation Date Acceptance Level Status
------------- --------------------------------- ------ ------------- ---------------- ---------
amsd 650.11.4.5-18.4240417 HPE 2019-07-19 PartnerSupported Update
fc-enablement 650.3.4.0.10-4240417 HPE 2019-03-12 PartnerSupported Installed
cru 650.6.5.10.4-1OEM.650.0.0.4240417 HPE 2018-04-04 PartnerSupported Installed
ilo 650.10.3.0.2-1OEM.650.0.0.4240417 HPE 2018-03-29 PartnerSupported Installed
smx-provider 650.03.15.00.4-4240417 HPE 2018-08-29 VMwareAccepted Installed
```
> TIP: 透過這指令可以在\*\*安裝前\*\*,列出那些套件將會被更新。以本次為例,這次更新主要是針對 amsd 套件的 bug 重要修正。
> Before: **amsd 650.11.4.0-18.4240417**
> After: **amsd 650.11.4.5-18.4240417**
##### 安裝更新/升級檔
1. **關閉或遷移**主機上所有的 VMs
2. **啟用**主機的 Maintenance Mode
3. 開始安裝更新/升級檔
4. 重啟主機
5. **關閉**主機的 Maintenance Mode
6. 開啟所有 VMs
啟用/關閉 **Maintenance Mode** (也可以改用 GUI 操作)
```shell
# 啟用
vim-cmd hostsvc/maintenance_mode_enter
# 關閉
vim-cmd hostsvc/maintenance_mode_exit
```
安裝更新/升級檔
> 應該要用哪種方式升級,這很難有個絕對答案。比較安全的方式,是用 update;而 install 才會安裝完整最新的套件。對於某些情況下也有可能這兩種方式沒有差異。官方說明參閱 [“esxcli software vib” commands to patch an ESXi 6.x/7.x host (2008939) (vmware.com)](https://kb.vmware.com/s/article/2008939?lang=en_us)
- install : 安裝、升級/降級套件
- update : 僅更新既有套件
- -d : *.zip* 檔
- -v : *.vib* 檔
```shell
esxcli software vib update --dry-run -d "/vmfs/volumes/LocalDisk/Patches/esxi6.5uX-mgmt-bundle-3.4.5-8.zip"
esxcli software vib update -d "/vmfs/volumes/LocalDisk/Patches/esxi6.5uX-mgmt-bundle-3.4.5-8.zip"
esxcli software vib install --dry-run -d "/vmfs/volumes/LocalDisk/Patches/ESXi670U3-18828794-HPE-Gen9plus-depot.zip"
esxcli software vib install -d "/vmfs/volumes/LocalDisk/Patches/ESXi670U3-18828794-HPE-Gen9plus-depot.zip"
```
##### 更新後的檢查
確認 `amsd` 更新後的版本號
```shell
esxcli software vib list | grep amsd
```
# ESXi Commands
##### Check whether the /tmp directory is full
```
vdf | grep tmp
```
##### System Module
```
esxcli system module list
esxcli system module set --enabled=false --module=
esxcli system module set --enabled=true --module=
```
##### 手動修改 vmx
> 經由 OVF 匯入 VM 後,設定裡有音效卡無法移除。必須手動修改 vmx 檔,將以下內容移除:
>
> sound.autoDetect = "TRUE"
> sound.virtualDev = "hdaudio"
> sound.fileName = "-1"
> sound.present = "TRUE"
> sound.pciSlotNumber = "35"
手動修改 vmx 檔後,還須執行以下指令更新 VM
```shell
# Find the Vmid for the affected VM
vim-cmd vmsvc/getallvms
# Reload configuration for the VM
vim-cmd vmsvc/reload
```
##### Network
```
[root@tpeitpexb95:~] esxcli network ip interface list
vmk0
Name: vmk0
MAC Address: 80:30:e0:3b:a0:c4
Enabled: true
Portset: vSwitch0
Portgroup: Management Network
Netstack Instance: defaultTcpipStack
VDS Name: N/A
VDS UUID: N/A
VDS Port: N/A
VDS Connection: -1
Opaque Network ID: N/A
Opaque Network Type: N/A
External ID: N/A
MTU: 1500
TSO MSS: 65535
RXDispQueue Size: 1
Port ID: 33554442
vmk1
Name: vmk1
MAC Address: 00:50:56:6b:5c:ed
Enabled: true
Portset: vSwitch1
Portgroup: FT1
Netstack Instance: defaultTcpipStack
VDS Name: N/A
VDS UUID: N/A
VDS Port: N/A
VDS Connection: -1
Opaque Network ID: N/A
Opaque Network Type: N/A
External ID: N/A
MTU: 1500
TSO MSS: 65535
RXDispQueue Size: 1
Port ID: 50331654
vmk2
Name: vmk2
MAC Address: 00:50:56:62:26:d7
Enabled: true
Portset: vSwitch1
Portgroup: FT2
Netstack Instance: defaultTcpipStack
VDS Name: N/A
VDS UUID: N/A
VDS Port: N/A
VDS Connection: -1
Opaque Network ID: N/A
Opaque Network Type: N/A
External ID: N/A
MTU: 1500
TSO MSS: 65535
RXDispQueue Size: 1
Port ID: 50331655
```
```
[root@tpeitpexb95:~] esxcli network ip interface ipv4 get
Name IPv4 Address IPv4 Netmask IPv4 Broadcast Address Type Gateway DHCP DNS
---- ------------- ------------- --------------- ------------ ----------- --------
vmk0 10.14.1.95 255.255.248.0 10.14.7.255 STATIC 10.14.0.254 false
vmk1 192.168.101.7 255.255.255.0 192.168.101.255 STATIC 0.0.0.0 false
vmk2 192.168.103.7 255.255.255.0 192.168.103.255 STATIC 0.0.0.0 false
```
```
[root@tpeitpexb95:~] esxcli network ip route ipv4 list
Network Netmask Gateway Interface Source
------------- ------------- ----------- --------- ------
default 0.0.0.0 10.14.0.254 vmk0 MANUAL
10.14.0.0 255.255.248.0 0.0.0.0 vmk0 MANUAL
192.168.101.0 255.255.255.0 0.0.0.0 vmk1 MANUAL
192.168.103.0 255.255.255.0 0.0.0.0 vmk2 MANUAL
```
# vCenter Patch
##### 官方連結
- 教學:[VMware vCenter Server 6.7 Update 3n Release Notes](https://docs.vmware.com/en/VMware-vSphere/6.7/rn/vsphere-vcenter-server-67u3n-release-notes.html)
- 下載: [Product Patches - VMware Customer Connect](https://customerconnect.vmware.com/patch)
##### 步驟程序
1. 下載 Patch file: `VMware-vCenter-Server-Appliance-6.7.0.48000-18010531-patch-FP.iso`
2. 上傳 \*.iso 到 vCenter VM 可以存取的任一個 datastore 裡 (*Recommend: 建立一個 Patches 目錄*)
3. 確認 vCenter VM 在哪一個 ESXi Host
4. 登入 ESXi Web Admin (*NOTE: 這裡不是 vCenter Web*)
5. 將 vCenter VM 關閉
6. 對 vCenter VM 進行一次快照備份
7. 重新開啟 vCenter VM
8. 設定 vCenter VM 掛載這次要 patch 的 iso 檔
9. 遠端工作電腦以 SSH 登入 vCenter VM
10. 開始執行系統 Patch 指令
11. 重啟 vCenter VM 後完成
##### Patch Commands
```shell
# To stage the ISO:
software-packages stage --iso
# To see the staged content:
software-packages list --staged
#To install the staged rpms:
software-packages install --staged
```
# vCenter 管理
##### 忘記 root 密碼
首先,連線到 ESXi 主機的 VMware Host Client,並選擇以網頁瀏覽器或 VMware Remote Console 方式,開啟 vCenter Server Appliance 的 Console 介面。來到「PHOTON」啟動頁面後,按下〔e〕鍵以開啟開機選項。
在「GNU GRUB」命令視窗中,添加 `rw init=/bin/bash` 命令參數,然後按下〔F10〕鍵繼續啟動系統。
接著,會來到 root 根路徑命令提示字元下,執行 `mount -o remount,rw /` 命令參數,以完成檔案系統根路徑的掛載。
最後執行 `passwd` 命令,即可完成 root 密碼的修改。
完成密碼修改後,記得執行 `umount /` 命令來停止檔案系統的掛載,最後執行 `reboot -f` 命令參數以便重新啟動 vCenter Server Appliance。
##### root 密碼到期設定
[變更根使用者的密碼及密碼到期設定](https://docs.vmware.com/tw/VMware-vSphere/6.7/com.vmware.vsphere.vcsa.doc/GUID-C63C82F1-D430-4710-8B92-177A79D3DE65.html)
##### vCenter Backup & Restore
這裡的備份不是指 VM snapshot,而是異地備份或者稱為冷備份。
備份工具需使用 VMware Appliance Management Interface (`https://:5480/`)。
備份目的支援以下傳輸協定:
- FTP(s)
- NFS
- SFTP
- SMB
- HTTPS
系統還原注意事項:
1. 需要使用相同版本 VCSA ISO 安裝檔。
2. 還原步驟與初始安裝程序類似,需要有一個 Windows 工作站 (VM 或實體機),而且網路必須與 vCenter 主機 (VCSA) 同一個子網路。
3. Windows 工作站先掛載 VCSA ISO 檔,執行 `vcsa-ui-install/win32/installer.exe` 開啟安裝/復原程序。
教學連結:
- [vCenter Server Appliance 6.7 File-Based Backup and Restore Walkthroughs - VMware vSphere Blog](https://blogs.vmware.com/vsphere/2018/05/vcenter-server-appliance-6-7-file-based-backup-and-restore-walkthroughs.html)
- [New vCenter Server Appliance File-Based Backup / Restore Walkthroughs - VMware vSphere Blog](https://blogs.vmware.com/vsphere/2017/01/vcenter-server-appliance-file-based-backup-restore-walkthroughs.html)
##### Syslog Server
將 vCenter 系統日誌導出至遠端的日誌伺服主機。
教學連結:
- [Configure desired level of vCenter logs sent to Remote Syslog Server](https://knowledge.broadcom.com/external/article/345261/configure-desired-level-of-vcenter-logs.html)
- [Streaming Events to a Remote Syslog Server](https://techdocs.broadcom.com/us/en/vmware-cis/vsphere/vsphere/8-0/configuring-vcenter-server-8-0/configuring-vcenter-server-using-the-management-interface/remote-streaming-of-events.html#GUID-F92A08A1-646A-4DCD-8DB0-47E6D2B49C5D-en)
# vCenter Converter
#### 簡介
VMware vCenter Converter Standalone
Home: [https://www.vmware.com/products/converter.html](https://www.vmware.com/products/converter.html)
#### 安裝
##### 錯誤: Error 1053
> Error 1053: The service did not respond to the start or control request in a timely fashion .
解決:參閱 KB: [https://kb.vmware.com/s/article/64993](https://kb.vmware.com/s/article/64993)
1. Click the ***Start*** button, then click ***Run***, type ***regedit***, and click ***OK***.
2. In the ***Registry Editor***, click the registry subkey `HKEY_LOCAL_MACHINE\SYSTEM\CurrentControlSet\Control`.
3. In the details pane, locate the ***ServicesPipeTimeout*** entry, right-click that entry and then select ***Modify***.
***Note:*** If the ***ServicesPipeTimeout*** entry does not exist, you must create it by selecting ***New*** on the ***Edit*** menu, followed by the ***DWORD Value***, then typing ***ServicesPipeTimeout***, and clicking ***Enter***.
4. Click ***Decimal***, enter the new timeout value in milliseconds, and then click ***OK***.(Modify the value to a larger one. Here is no recommended value, adjust this value accordingly.)
5. Restart the computer.
6. Manual start vCenter Converter Agent/Server/Worker service in Windows Service Manager. If the service is still failed to start with Windows event 7009, increase the "ServicesPipeTimeout" value.