AIX VM with qemu
Introduction
What can it be used for?
- AIX Training and Practice
- Testing/Developing Environment for AIX
- Cybersecurity Lab for AIX
- Running AIX on your laptop for whatever you want to accomplish
Prerequisities:
- QEMU Install
- aix_7200-04-00-1937_1of2_112019.iso
- Fedora 40 Linux Install (Recommended)
Updated by 2025/2/17: AIX 7200-04-00 成功更新到 7200-05-06-2320,使用官方更新程序,時間花費 5 小時 10 分。
QEMU commands
PowerPC System Board-specific
qemu-system-ppc64 --machine helpcobra@fedora-vm:~$ qemu-system-ppc64 --version
QEMU emulator version 8.2.6 (qemu-8.2.6-3.fc40)
Copyright (c) 2003-2023 Fabrice Bellard and the QEMU Project developers這版的 QEMU 已經修復了 ps, crontab, cron, java 指令問題。
Install AIX from CD-ROM
Create a VM disk
mkdir aix72VM
cd aix72VM
qemu-img create -f  qcow2  hdisk0.qcow2  20G
注意: AIX 版本必須 7200-03-00 以後版本才有支援。
aix_7200-04-00-1937_1of2_112019.iso
cd aix72VM
mv aix_7200-04-00-1937_1of2_112019.iso AIX72.iso
Boot from cd-rom
cd aix72VM
qemu-system-ppc64 -cpu POWER8 \
-machine pseries -m 4096 -serial stdio \
-drive file=hdisk0.qcow2,if=none,id=drive-virtio-disk0 \
-device virtio-scsi-pci,id=scsi \
-device scsi-hd,drive=drive-virtio-disk0 \
-cdrom $PWD/AIX72.iso \
-prom-env "boot-command=boot cdrom:" \
-prom-env "input-device=/vdevice/vty@71000000" \
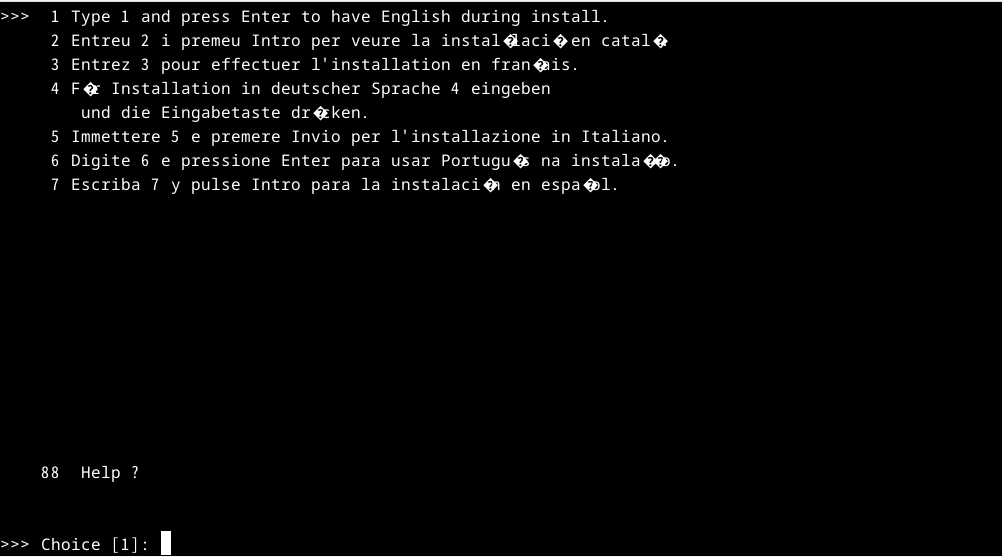
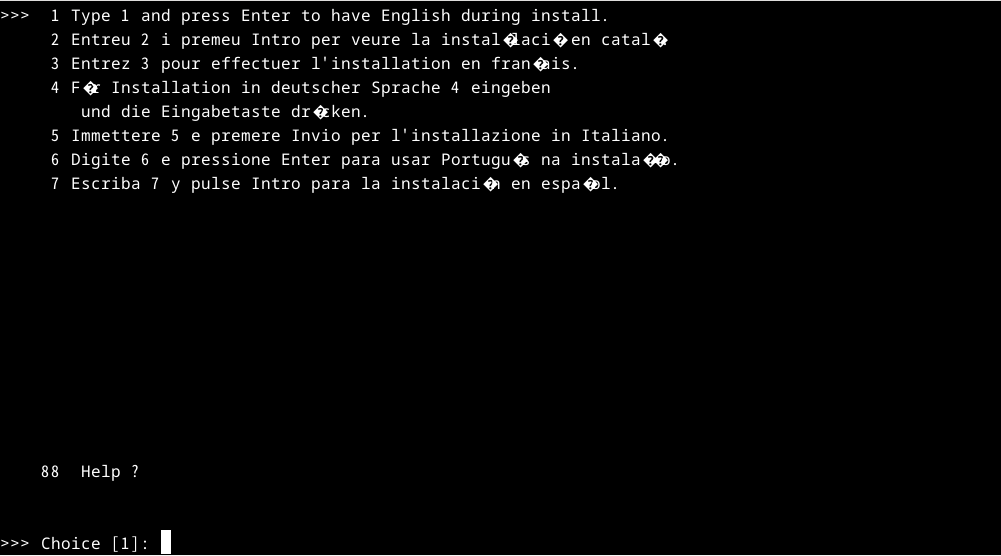
-prom-env "output-device=/vdevice/vty@71000000"Type 1 and press Enter

Press Enter
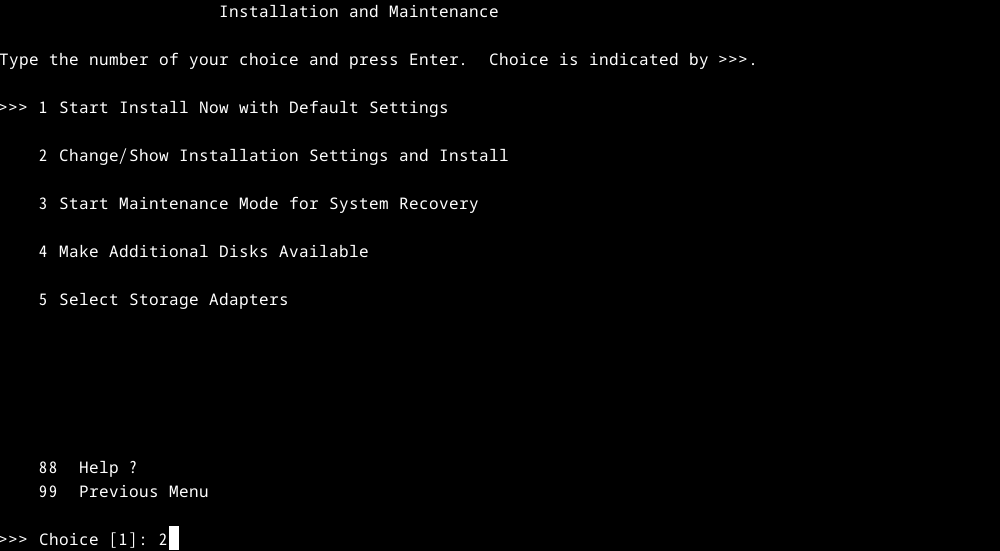
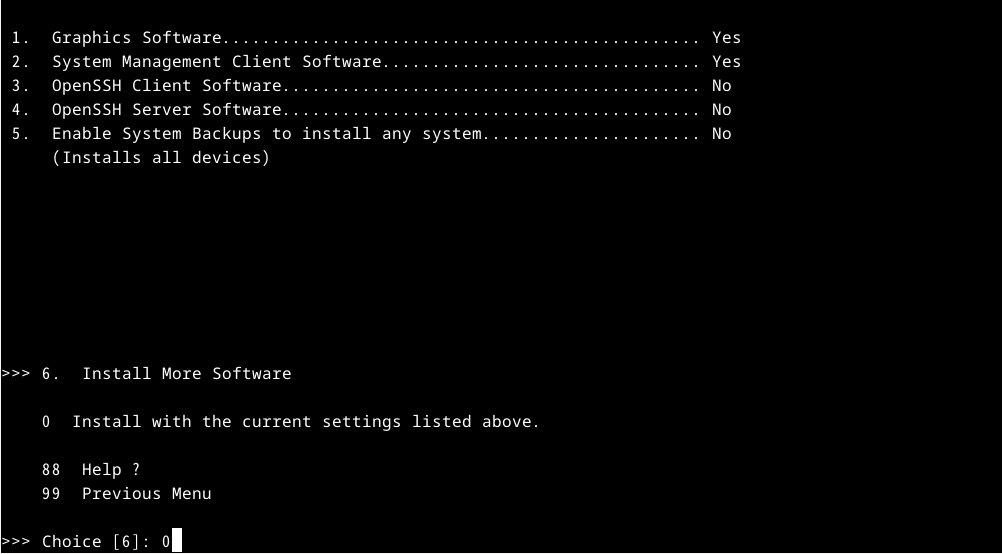
Type 2
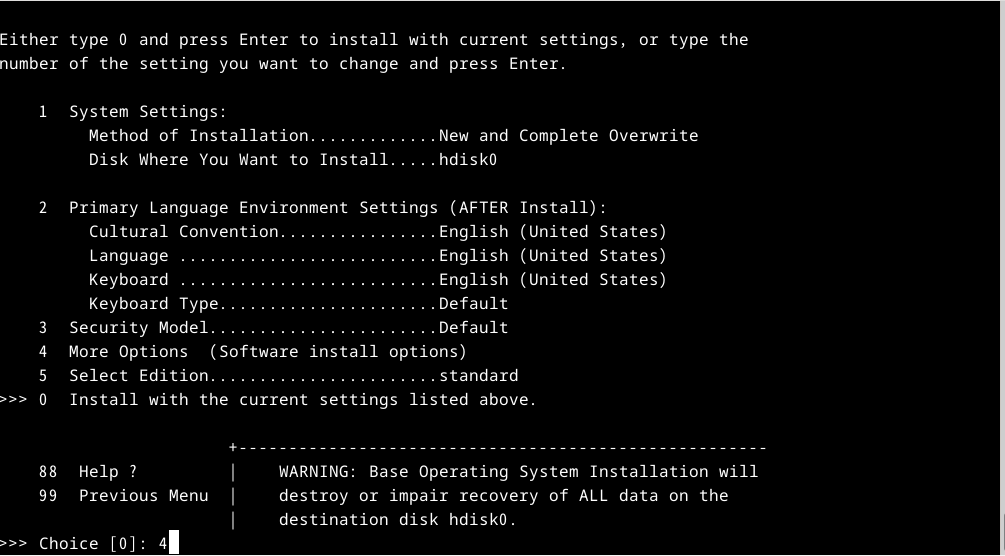
Type 4
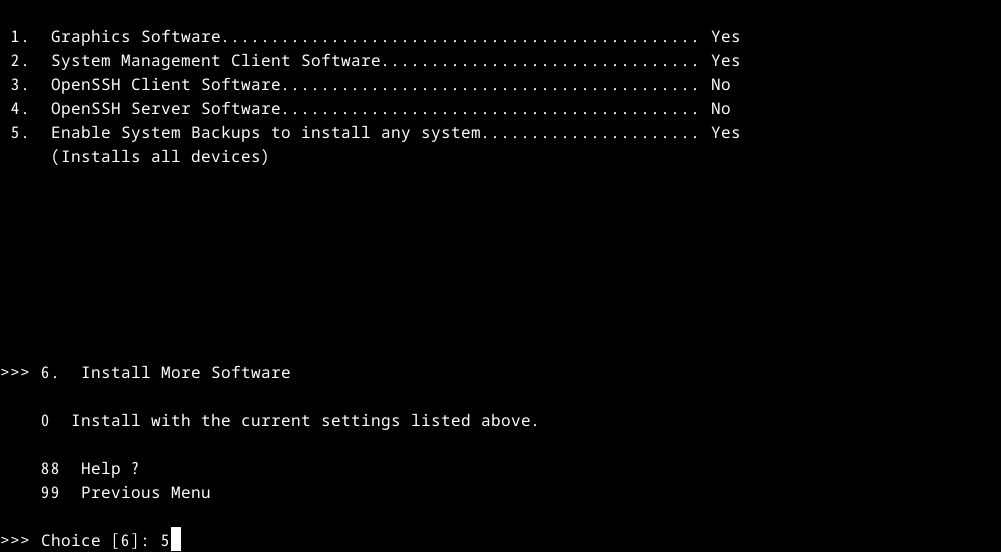
Type 5
Type 0
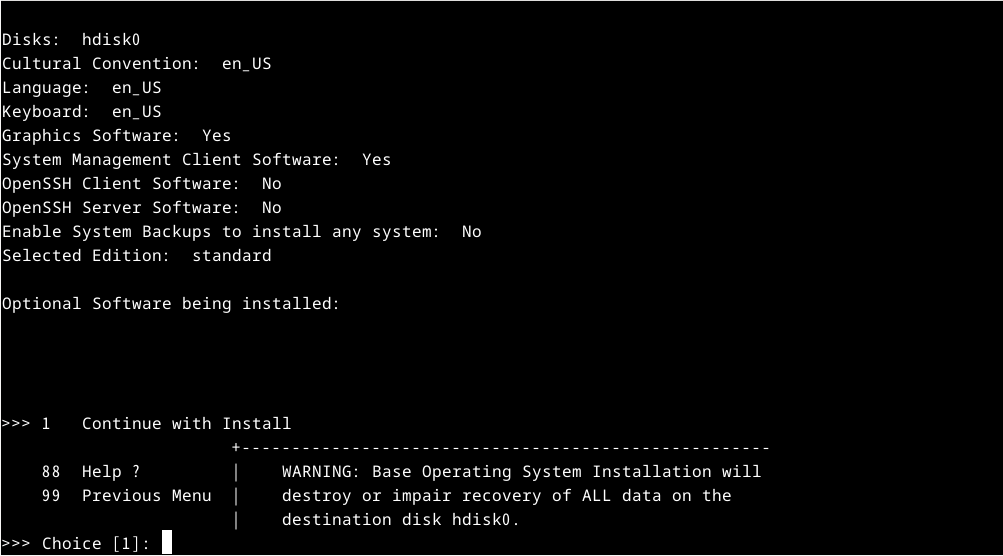
Press Enter to install AIX
看到這畫面時,表示 AIX 作業系統已經完成安裝。
輸入 Ctrl + C 離開

Fix boot issue
Boot from cd-rom
cd aix72VM

qemu-system-ppc64 -cpu POWER8 \
-machine pseries -m 4096 -serial stdio \
-drive file=hdisk0.qcow2,if=none,id=drive-virtio-disk0 \
-device virtio-scsi-pci,id=scsi \
-device scsi-hd,drive=drive-virtio-disk0 \
-cdrom $PWD/AIX72.iso \
-prom-env "boot-command=boot cdrom:" \
-prom-env "input-device=/vdevice/vty@71000000" \
-prom-env "output-device=/vdevice/vty@71000000"
Type 1 and press Enter

Press Enter
Type 3
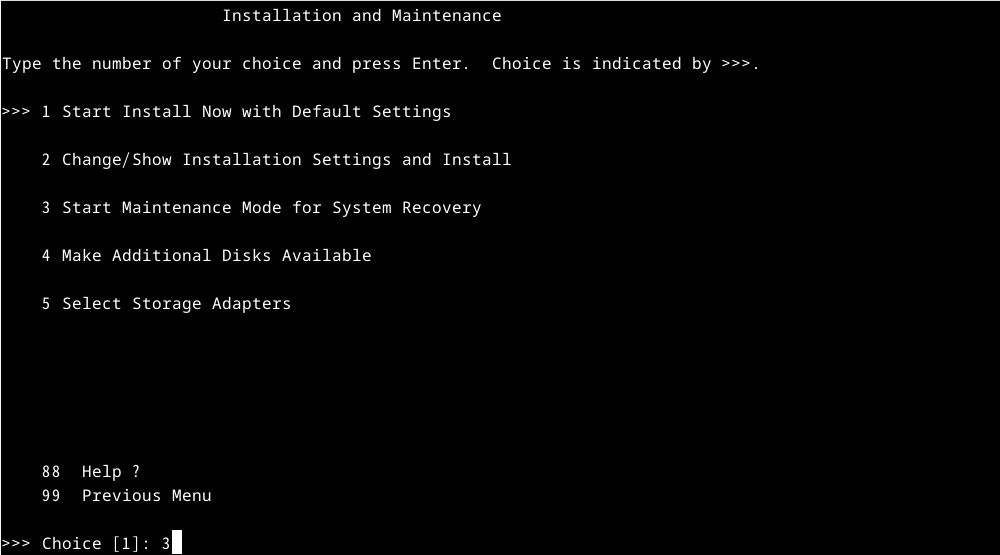
Type 0
Type 1
Type 1

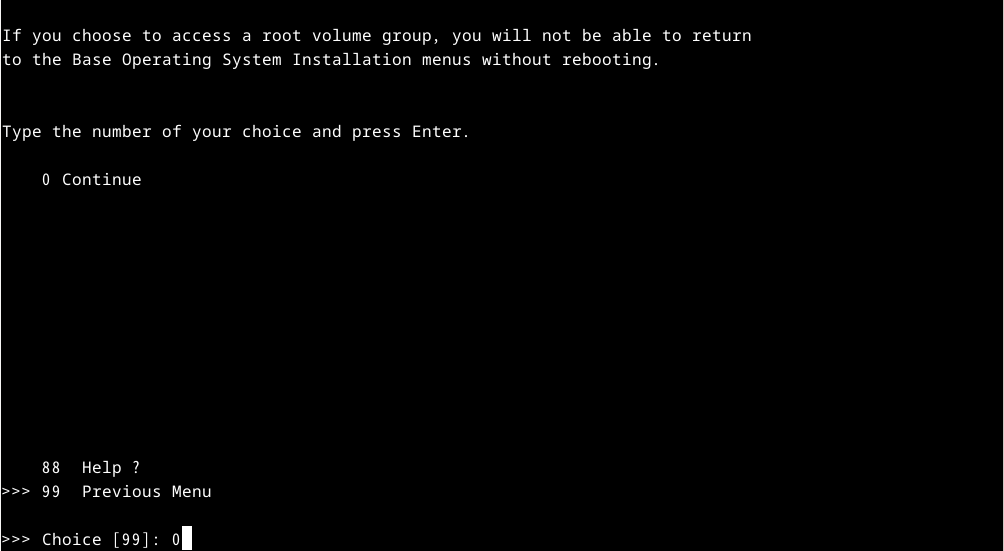
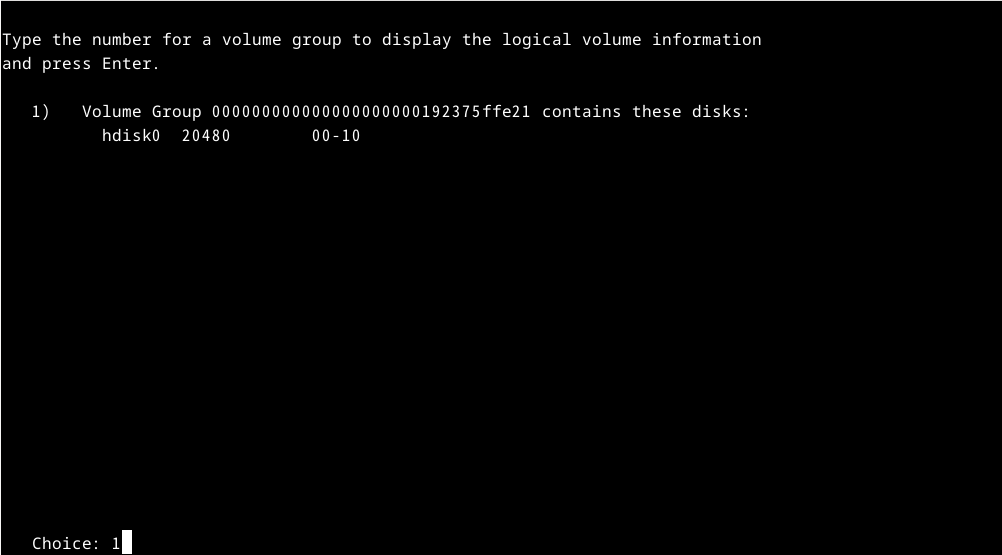
輸入修復開機指令
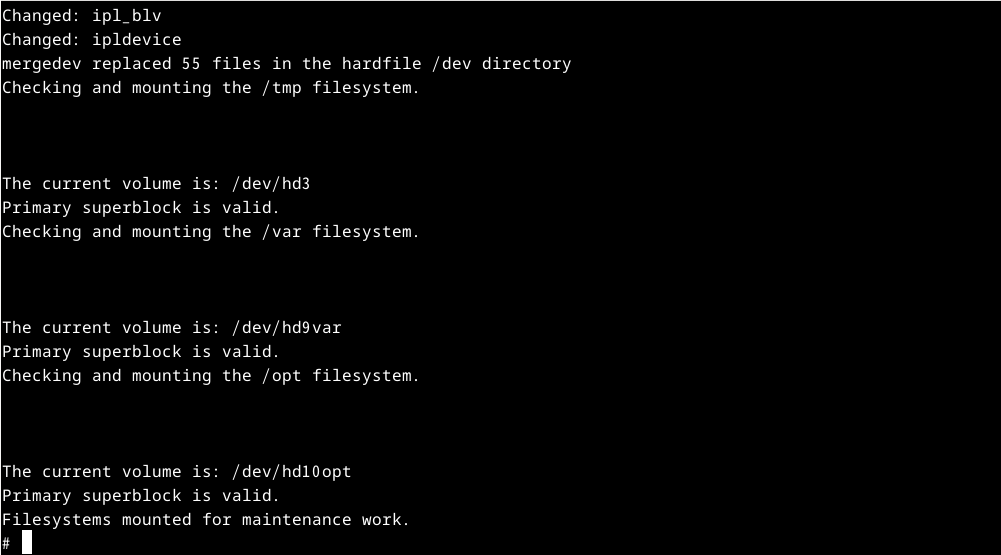
Fix boot issue
cd /sbin/helpers/jfs2
mv fsck64 fsck64.old
ln -s fsck fsck64

mv logredo64 logredo64.old
ln -s logredo logredo64

sync;sync;
halt
First boot from hdisk
cd aix72VM
qemu-system-ppc64 -cpu POWER8 \
-machine pseries -m 4096 -serial stdio \
-drive file=hdisk0.qcow2,if=none,id=drive-virtio-disk0 \
-device virtio-scsi-pci,id=scsi \
-device scsi-hd,drive=drive-virtio-disk0 \
-cdrom $PWD/AIX72.iso \
-prom-env "boot-command=boot hdisk:" \
-prom-env "input-device=/vdevice/vty@71000000" \
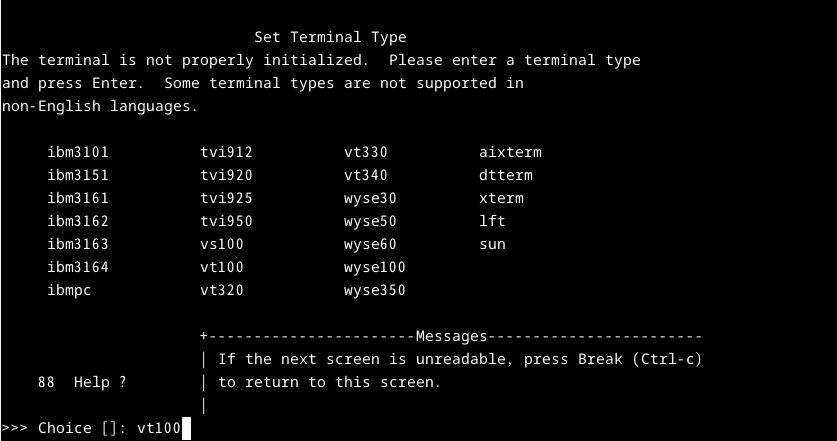
-prom-env "output-device=/vdevice/vty@71000000"Type vt100
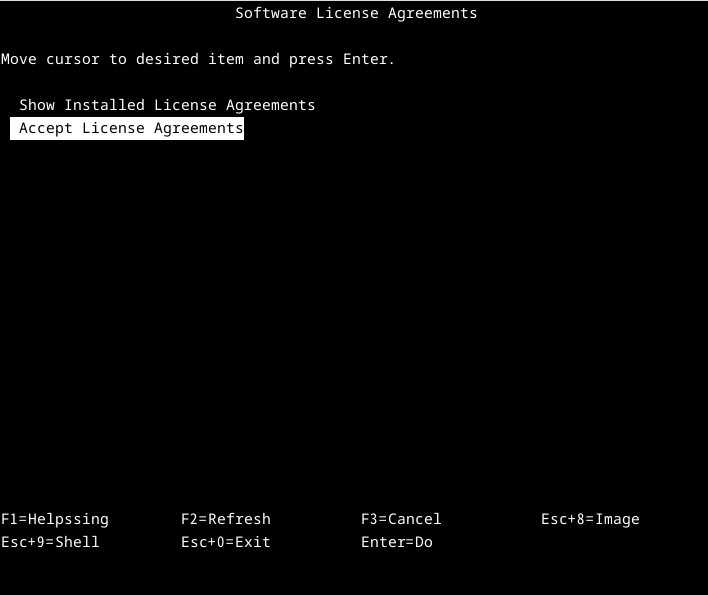
Select: Accept License Agreements
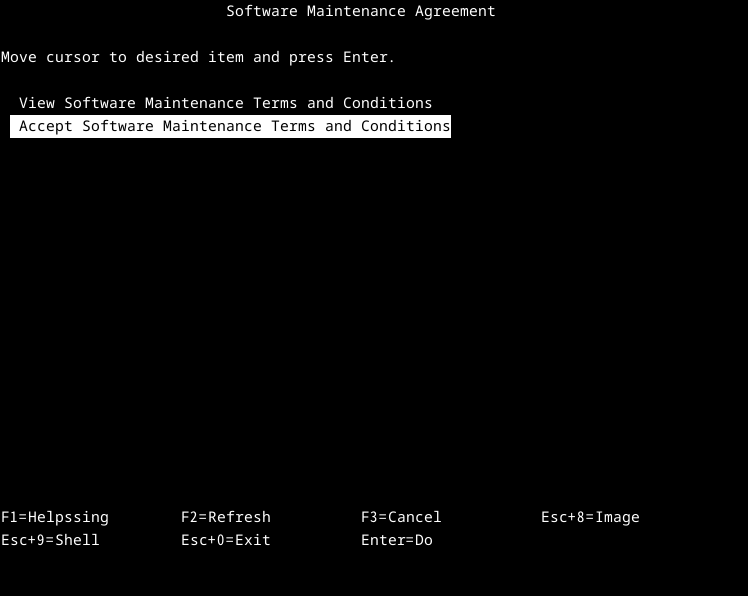
Tips: 如果這裡的畫面出現沒有對齊的情況,且影響到後續的操作。按下 Ctrl + C 先中斷離開,將終端機的字形調更小,然後再重新執行步驟。
Select: Accept Software Maintenance Terms and Conditions
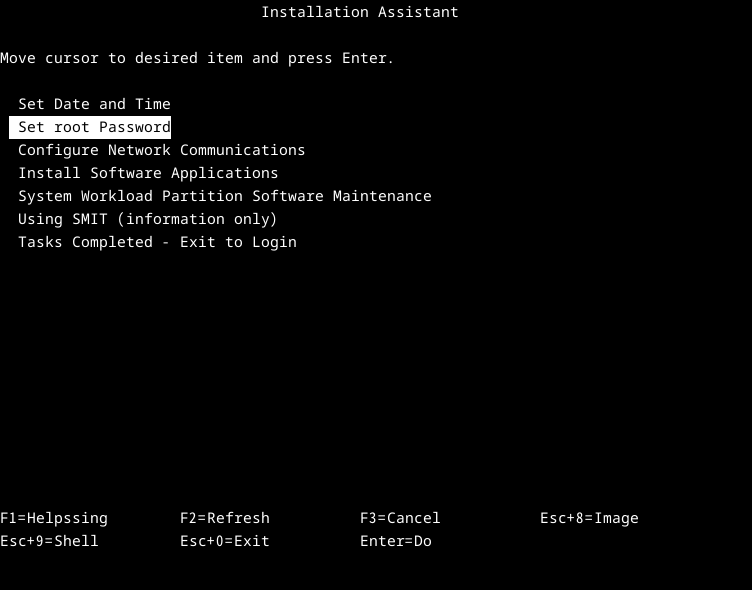
Select: Set root Password
Tip: 設定完密碼後,最後要選擇 Task Completed - Exit to Login。如果略過這,下次在開啟系統時,初始化的步驟仍會再出現。
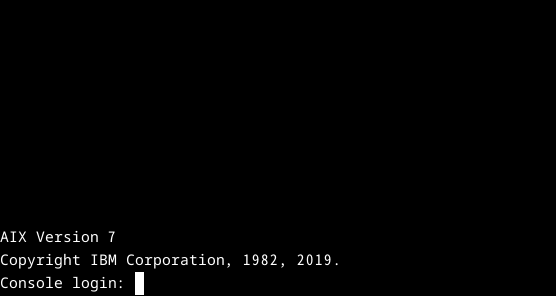
用剛剛設定的 root 帳密登入
Post-tasks
- Disable some problematic services
rmitab diagd
rmitab rcnfs
rmitab aso
rmitab clcomd
rmitab pfcdaemon
stopsrc -s clcomd
stopsrc -s pfcdaemon

lsitab -a
lssrc -a
- Network setup
On Linux)
net_tap.sh:
BRIDGE=virbr0
NETWORK=192.168.99.0
NETMASK=255.255.255.0
GATEWAY=192.168.99.1
DHCPRANGE=192.168.99.2,192.168.99.50
TAP=tap0

sudo ip link add $BRIDGE type bridge
sudo ip link set dev $BRIDGE up
sudo ip addr add dev $BRIDGE $GATEWAY/$NETMASK

sudo ip tuntap add $TAP mode tap
sudo ip link set $TAP master $BRIDGE
sudo ip link set up dev $TAP

# Uncomment the following lines to enable the DHCP server
#dns_cmd=(
#    dnsmasq
#    --strict-order
#    --except-interface=lo
#    --interface=$BRIDGE
#    --listen-address=$GATEWAY
#    --bind-interfaces
#    --dhcp-range=$DHCPRANGE
#    --conf-file=""
#    --pid-file=/var/run/qemu-dnsmasq-$BRIDGE.pid
#    --dhcp-leasefile=/var/run/qemu-dnsmasq-$BRIDGE.leases
#    --dhcp-no-override
#)
#echo ${dns_cmd[@]} | sudo bash
Run net_tap.sh
bash net_tap.shAllow access to internet
sudo firewall-cmd --permanent --zone=public --add-interface=tap0
sudo firewall-cmd --permanent --add-masquerade
sudo firewall-cmd --reload
Boot with network interface tap0
qemu-system-ppc64 -cpu POWER8 \
  -machine pseries -m 4096 -serial mon:stdio \
  -drive file=hdisk0.qcow2,if=none,id=drive-virtio-disk0 \
  -device virtio-scsi-pci,id=scsi \
  -device scsi-hd,drive=drive-virtio-disk0 \
  -cdrom $PWD/AIX72.iso \
  -net nic -net tap,script=no,ifname=tap0 \
  -prom-env "boot-command=boot disk:" \
  -nographic
On AIX)
# Check the network interface
lsdev -Cc if
lsdev -Cc adapter

# Set the ip
chdev -l en0 -a netaddr=192.168.99.100 -a netmask=255.255.255.0 -a state=up
route add 0 192.168.99.1
# Alternatively, using the following command instead
/usr/sbin/mktcpip -h'aixvm' -a'192.168.99.100' -m'255.255.255.0' -i'en0' -g'192.168.99.1' -A'no' -t'N/A'

echo "nameserver 1.1.1.1" > /etc/resolv.conf
- Increase the filesystem size
lsdev -Cc disk
lscfg -vl hdisk0
chfs -a size=+1024M /home
chfs -a size=+2048M /opt
chfs -a size=+512M /tmp
chfs -a size=+2048M /usr
chfs -a size=+1024M /var
- Install OpenSSH
mount  -v  cdrfs  -o  ro  /dev/cd0  /mnt
mkdir   /tmp/ssh_install
cd  /mnt/installp/ppc
cp  openssh*  /tmp/ssh_install
cd  /tmp/ssh_install
installp -acgXYd . openssh.base openssh.license openssh.man.en_US openssh.msg.en_US
lssrc  -s  sshd
- Fix the RPM issue
error: cannot open Packages index using db4 - Invalid argument (22)
error: cannot open Packages database in /opt/freeware/packages
error: db4 error(22) from dbenv->open: Invalid argument
Solution: fixrpm.sh
#!/usr/bin/ksh

cd /opt/freeware
rm -f *.rpm.packages.tar
tar -chvf `date +"%d%m%Y"`.rpm.packages.tar packages
rm -f /opt/freeware/packages/__*
/usr/bin/rpm --rebuilddb

exit 0
Edit /etc/initab, insert the line after the rctcpip
rctcpip:23456789:wait:/etc/rc.tcpip > /dev/console 2>&1 # Start TCP/IP daemons
fixrpm:23456789:once:/fixrpm.sh > /dev/null 2>&1 # Added by Alang
- Install AIX Toolbox
Download the files
- dnf_aixtoolbox.sh : https://public.dhe.ibm.com/aix/freeSoftware/aixtoolbox/ezinstall/ppc/dnf_aixtoolbox.sh
- openssl-1.1.2.2000.tar.Z : https://www.ibm.com/resources/mrs/assets?source=aixbp&S_PKG=openssl
cd /home/worktmp
uncompress openssl-1.1.2.2000.tar.Z
tar -xvf openssl-1.1.2.2000.tar
cd openssl-1.1.2.2000
installp -qaXFY -d . openssl.base openssl.license openssl.man.en_US
openssl version
cd /home/worktmp
rpm --rebuilddb
ksh dnf_aixtoolbox.sh -y
/opt/freeware/bin/dnf update
/opt/freeware/bin/dnf install bash- Optional tasks
> Custom the prompt, create the profile /.profile
PS1="`whoami`@`hostname -s`:"'${PWD##*/}> '> Timezone
smitty > System Environments > Change/Show Date and Time > Change Time Zone Using System
echo $TZ> The ordering of certain name resolution services
修復 ping 本地主機名時會回應遲鈍問題。
Edit: /etc/netsvc.conf
hosts = local, bind4> Set the environment variables
Edit: /etc/environment
# Fix for not properly displaying with smitty on the tmux
TERM=xterm
其他管理工作
- 掛載 CD ISO 檔
修改qemu 啟動參數 -cdrom /path/to/your-cd.iso
qemu-system-ppc64 -cpu POWER8 \
  -machine pseries -m 4096 -serial mon:stdio \
  -drive file=hdisk0.qcow2,if=none,id=drive-virtio-disk0 \
  -device virtio-scsi-pci,id=scsi \
  -device scsi-hd,drive=drive-virtio-disk0 \
  -cdrom $PWD/AIX72.iso \
  -net nic -net tap,script=no,ifname=tap0 \
  -prom-env "boot-command=boot disk:" \
  -nographic
AIX 掛載指令
mount -v cdrfs -o ro /dev/cd0 /mnt- 增加第2顆虛擬硬碟
在 Linux 主機:新增 5G 虛擬磁碟 hdisk1.qcow2
cd aix72VM
qemu-img create -f qcow2 hdisk1.qcow2 5G
修改啟動指令,新增兩行參數
注意:之後如有變更參數的 disk id 名稱,啟動後 AIX 內的 hdisk 編號也會變動。
-drive file=hdisk1.qcow2,if=none,id=drive-virtio-disk1 \
-device scsi-hd,drive=drive-virtio-disk1 \
完整啟動參數
qemu-system-ppc64 -cpu POWER8 \
  -machine pseries -m 4096 -serial mon:stdio \
  -cdrom $PWD/AIX72.iso \
  -device virtio-scsi-pci,id=scsi \
  -drive file=hdisk0.qcow2,if=none,id=drive-virtio-disk0 \
  -device scsi-hd,drive=drive-virtio-disk0 \
  -drive file=hdisk1.qcow2,if=none,id=drive-virtio-disk1 \
  -device scsi-hd,drive=drive-virtio-disk1 \
  -net nic -net tap,script=no,ifname=tap0 \
  -prom-env "boot-command=boot disk:" \
  -nographic -smp 2
在 AIX 主機:檢視硬碟 hdisk1
root@aixvm:> lspv
hdisk0          00000000375ffb46                    rootvg          active
hdisk1          00000000fdb40f0f                    rootvg          active

root@aixvm:> lsdev -Cc disk
hdisk0 Available 00-10 MPIO Other Virtio SCSI Disk Drive
hdisk1 Available 00-10 MPIO Other Virtio SCSI Disk Drive

root@aixvm:> lsmpio -q
Device           Vendor Id  Product Id       Size       Volume Name
---------------------------------------------------------------------------------
hdisk0           QEMU       QEMU HARDDISK      20.00GiB  -
hdisk1           QEMU       QEMU HARDDISK      20.00GiB  -

root@aixvm:> lspv -u
hdisk0          00000000375ffb46                    rootvg          active              33130drive-virtio-disk00DQEMU HARDDISK04QEMUvrtscsi                  8eca6bf6-b924-0872-c039-8cb2a62de21a
hdisk1          00000000fdb40f0f                    rootvg          active              33130drive-virtio-disk10DQEMU HARDDISK04QEMUvrtscsi                  c618c61a-8c74-19e4-6cfa-beae464aaf14
- 增加 vCPU
預設 QEMU 只有 1 vCPU,要改善 AIX 的效能,可以視硬體等級增加更多 vCPU。
qemu-system-ppc64 啟動參數加上
-nographic -smp 2,sockets=2,cores=1,threads=1- 增加虛擬網卡裝置
qemu-system-ppc64 啟動參數設置兩個虛擬網卡
-net nic \
-net nic \
-net tap,script=no,ifname=tap0 \
如果要榜定 mac addr.
-net nic,macaddr=56:44:45:30:31:31 \
-net nic,macaddr=56:44:45:30:31:32 \
-net tap,script=no,ifname=tap0 \
系統效能
實測數據
- AIX 更新: 從 7200-04-00-0000 至 7200-05-06-2320,更新檔約 7.9GB,總花費時間 5 小時 10 分。
- DB2 Server: 安裝 v11.1 花費 51 分鐘,安裝 FP 7 花費 1.5 小時。
I/O 優化
- AIX 分配 4GB RAM 時,外層 Fedora Linux 建議 12 GB以上 RAM,可避免 Fedora Linux 使用 SWAP memory,以致影響 AIX 的 I/O 效能。
- 如果 Fedora Linux 啟用多個 AIX VMs,Fedora Linux 記憶體配置需要適時地增加。
- 外部電腦要與 AIX 進行檔案交換時,可使用 scp 指令。盡可能不要使用 Fedora Linux 做中繼,因為 Fedora Linux 同時間要執行寫入與讀取,會影響檔案傳輸的效率。
磁區建議最小空間分配
- / : 1GB
- /usr : 5GB
- /var : 1.5GB
- /tmp : 1GB
- /opt : 7GB (For DB2 Server)
遷移現有的 AIX 系統
References
- AIX on qemu-system-ppc64
- Run AIX 7.2 on x86 with QEMU – Kwakou SysAdmin
- Qemu模拟器运行AIX 7.2 系统 - 运维小菜鸟 - 博客园 (cnblogs.com)
- Run your AIX VM on x86 using KVM and QEMU (ibm.com)
- qemu7模拟安装aix72,详细过程,附带镜像_aix 7.2版本qcow2格式镜像下载-CSDN博客
- AIX 7.2 虚拟机安装 - 杰哥的{运维,编程,调板子}小笔记 (jia.je)
- AIX for System Administrators: DEVOPS - QEMU (aix4admins.blogspot.com)
- YT: AIX 7.2 installation in QEMU - YouTube
- YT: Install AIX on QEMU using virsh and virt-manager tools - YouTube
- YT: Updates on Install AIX and run PowerHA using virsh and virt-manager - YouTube
- libvirt: QEMU command-line passthrough
- Install AIX on x86 using QEMU